Fail2ban on Linux: Protect Your Server from Brute-Force Attacks
Every Linux server exposed to the internet is getting hammered. SSH brute-force attempts, WordPress login floods, bad bots probing your web server. It never stops. If you check your auth logs right now, chances are you’ll find hundreds of failed login attempts you never knew about.
Fail2ban is the practical fix. It watches your log files, detects repeated failures, and automatically bans the offending IPs using your firewall. It’s lightweight, flexible, and has been a staple on Linux servers for years. This guide covers installation, configuration, and real-world tuning so it actually protects you instead of just sitting there with default settings.
How Fail2ban Works
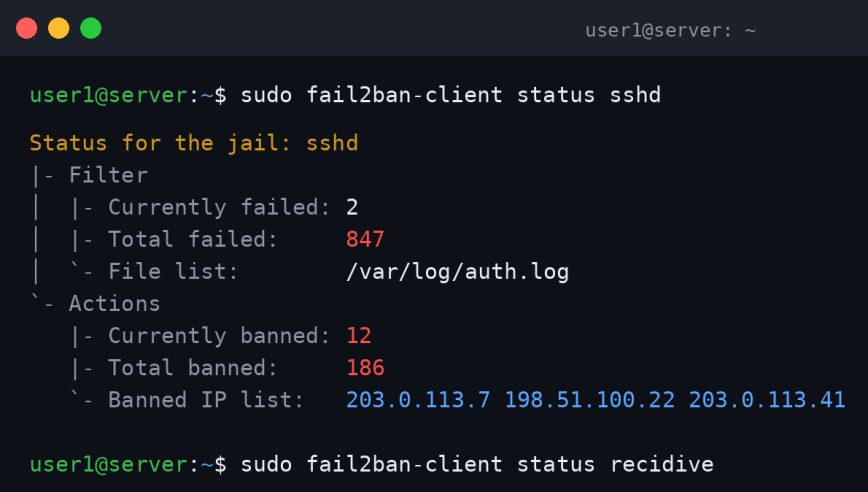
Fail2ban reads log files (or the systemd journal, depending on your backend) in real time. When it sees a configurable number of failures from a single IP within a configurable window, it fires a ban action. By default, that action adds a rule to iptables (or nftables, or firewalld, depending on your setup) that drops traffic from that IP for a set duration.
Three core concepts to understand:
- Filter: A set of regex patterns that match failure lines in a log file.
- Jail: Combines a filter with a log file path, threshold settings, and a ban action.
- Action: What happens when the threshold is hit. Usually a firewall ban, but can also send email alerts.
Fail2ban ships with filters and jails for dozens of services: SSH, Apache, Nginx, Postfix, Dovecot, and more. Most of the time, you just need to enable the jails you care about and tweak a few numbers.
Installation
Fail2ban is in the default repositories of every major distribution.
Debian/Ubuntu:
sudo apt update
sudo apt install fail2ban
Fedora / RHEL 9+ / Rocky / AlmaLinux:
sudo dnf install fail2ban
Arch Linux:
sudo pacman -S fail2ban
Enable and start the service:
sudo systemctl enable --now fail2ban
Check it’s running:
sudo systemctl status fail2ban
You should see active (running). If not, check the logs with sudo journalctl -u fail2ban -n 50.
The Right Way to Configure Fail2ban
Don’t edit /etc/fail2ban/jail.conf directly. That file gets overwritten on package upgrades. Your changes will disappear.
The cleanest approach is to create a new file in the jail.d directory:
sudo nano /etc/fail2ban/jail.d/custom.conf
Alternatively, you can copy the default config and edit the copy:
sudo cp /etc/fail2ban/jail.conf /etc/fail2ban/jail.local
Settings in files under jail.d/ and in jail.local override the defaults in jail.conf. Always use one of these two methods.
Basic Configuration: The [DEFAULT] Section
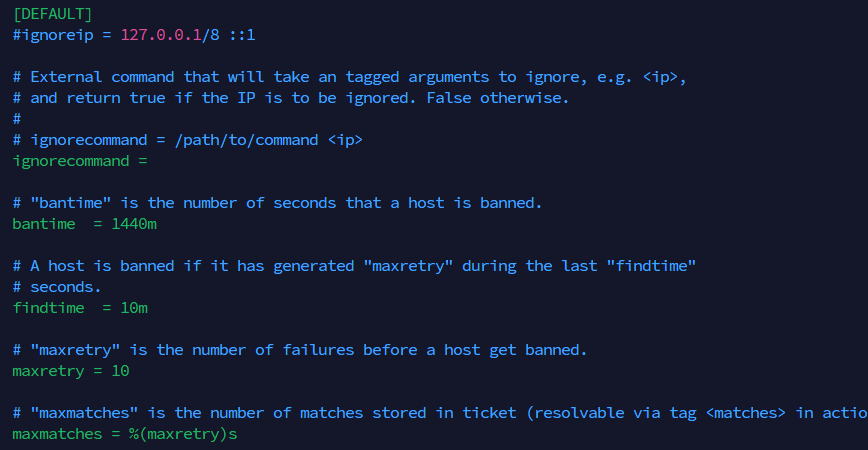
Open your jail.local and find the [DEFAULT] block. These settings apply to every jail unless overridden at the jail level. Here are the key values to understand and tune:
[DEFAULT]
bantime  = 1h
findtime = 10m
maxretry = 5
ignoreip = 127.0.0.1/8 ::1
bantime: How long the ban lasts. Default is usually 10 minutes, which is too short. I use1hat minimum. For aggressive attackers, consider24hor even1w.findtime: The window in which failures are counted. 5 failures within 10 minutes triggers a ban.maxretry: Number of failures before a ban. 5 is reasonable for SSH. You can drop it to 3 for extra aggression.ignoreip: IPs that will never be banned. Always add your own IP here. Getting locked out of your own server is a very bad day.
Note: bantime also accepts multiplier values like -1 for a permanent ban. Use permanent bans carefully.
Add your own IP to ignoreip before enabling any jails. If your server has a public IPv6 address, include that too. Fail2ban supports IPv6, but some older filter patterns only match IPv4 addresses, so verify your jails are catching both.
ignoreip = 127.0.0.1/8 ::1 YOUR.IP.ADDRESS.HERE
Enabling the SSH Jail
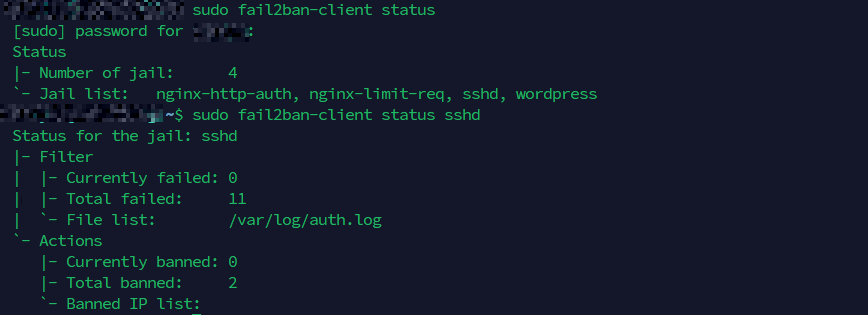
The SSH jail is the most important one for most servers. It’s usually included but may be disabled by default.
In your jail.local or a new file at /etc/fail2ban/jail.d/sshd.conf:
[sshd]
enabled  = true
port     = ssh
logpath  = %(sshd_log)s
backend  = %(sshd_backend)s
maxretry = 3
bantime  = 1h
If you’ve moved SSH to a non-standard port (which you should, as covered in the Linux Server Setup guide), update the port line:
port = 2222
On systemd-based systems, the %(sshd_log)s variable points to the journal automatically. On older systems using /var/log/auth.log or /var/log/secure, Fail2ban handles this too via the backend setting.
Reload after any config change:
sudo fail2ban-client reload
Enabling Jails for Apache and Nginx
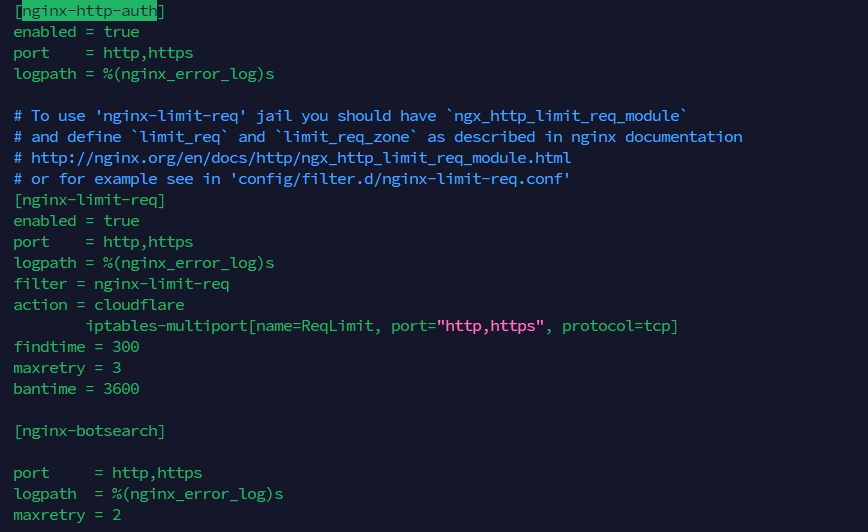
Web servers attract their own flavor of abuse: 404 scanners, login bruteforcers, and bad bots hammering your server with junk requests.
Apache
[apache-auth]
enabled  = true
logpath  = %(apache_error_log)s
maxretry = 5

[apache-badbots]
enabled  = true
logpath  = %(apache_access_log)s
maxretry = 2

[apache-noscript]
enabled  = true
logpath  = %(apache_access_log)s
maxretry = 6
Nginx
[nginx-http-auth]
enabled  = true
logpath  = %(nginx_error_log)s
maxretry = 3

[nginx-limit-req]
enabled  = true
logpath  = %(nginx_error_log)s
maxretry = 10
The nginx-limit-req jail catches clients that are hitting your limit_req rate limits in Nginx config. If you’re tuning your web server for high traffic, that pair works well together.
Note: The %(nginx_error_log)s and %(apache_error_log)s variables are defined by your distro’s Fail2ban package. If Fail2ban reports that a log path doesn’t exist, set it explicitly (e.g., logpath = /var/log/nginx/error.log).
Checking Jail Status and Active Bans
This is where the fail2ban-client command becomes your best friend.
List all active jails:
sudo fail2ban-client status
Output will look like:
Status
|- Number of jail:      3
`- Jail list:   nginx-http-auth, sshd, apache-badbots
Check a specific jail for ban details:
sudo fail2ban-client status sshd
Status for the jail: sshd
|- Filter
|  |- Currently failed: 2
|  |- Total failed:     143
|  `- File list:        /var/log/auth.log
`- Actions
   |- Currently banned: 5
   |- Total banned:     38
   `- Banned IP list:   203.0.113.7 198.51.100.22 ...
143 total failures is not unusual. On an internet-facing server, this happens within hours. This is exactly why Fail2ban matters.
Manually Banning and Unbanning IPs
Sometimes you want to manually ban a known-bad IP. Or you’ve accidentally banned yourself and need to get back in.
Ban an IP manually:
sudo fail2ban-client set sshd banip 203.0.113.99
Unban an IP:
sudo fail2ban-client set sshd unbanip 203.0.113.99
If you’ve locked yourself out and have console access (or another IP to connect from), the unban command above gets you out. This is also why adding your IP to ignoreip before you start is so important.
Incremental Bans with recidive
The recidive jail is one of the most useful and least-used features of Fail2ban. It watches Fail2ban’s own log file and bans IPs that keep coming back after being banned.
An IP gets banned by the SSH jail, the ban expires, and it immediately starts brute-forcing again. The recidive jail catches that pattern and applies a much longer ban.
[recidive]
enabled  = true
logpath  = /var/log/fail2ban.log
action   = %(action_mwl)s
bantime  = 1w
findtime = 1d
maxretry = 5
With this config, an IP that gets banned 5 times within a day earns a one-week ban. Adjust to taste. This is the closest thing to a persistent attacker blocklist you’ll get without external threat feeds.
Note: If your system doesn’t write to /var/log/fail2ban.log (some journal-only setups), set backend = systemd and logpath = in the recidive jail, or verify that Fail2ban is configured to write a traditional log file.
Testing Your Filters
Before enabling a jail, it’s smart to verify that the filter regex actually matches your log entries. Fail2ban includes a testing tool for this:
sudo fail2ban-regex /var/log/auth.log /etc/fail2ban/filter.d/sshd.conf
Sample output:
Results
=======

FoundIP: 203.0.113.7 (37 times)
FoundIP: 198.51.100.5 (12 times)

Date template hits:
...

Lines: 4821 lines, 0 ignored, 49 matched, 4772 missed
If you’re writing a custom filter, run this against your actual log file to confirm the regex is matching what you expect. A filter that matches nothing protects nothing.
Writing a Custom Filter
The built-in filters cover common services, but you’ll eventually need one for a custom application or log format. Custom filters live in /etc/fail2ban/filter.d/.
Here’s a minimal example for blocking repeated 401 responses from a web application that logs to its own file:
# /etc/fail2ban/filter.d/myapp-auth.conf
[Definition]
failregex = ^ .* "POST /login" 401
ignoreregex =
The <HOST> tag is required. Fail2ban replaces it with a regex that captures the offending IP address. Without it, the filter won’t extract anything to ban.
Test it before enabling:
sudo fail2ban-regex /var/log/myapp/access.log /etc/fail2ban/filter.d/myapp-auth.conf
Then create a jail that uses it:
[myapp-auth]
enabled  = true
filter   = myapp-auth
logpath  = /var/log/myapp/access.log
maxretry = 5
bantime  = 1h
The filter value matches the filename without the .conf extension. Keep your regex as specific as possible. A broad pattern that matches legitimate traffic will ban real users.
Fail2ban with nftables (Debian 12+, Ubuntu 22.04+)
On modern Debian and Ubuntu systems, nftables is the default firewall backend. Fail2ban’s default banaction still uses iptables, which works through the iptables-nft compatibility layer on most installs. But if you’re running pure nftables without the compatibility layer, you need to set the ban action explicitly.
In jail.local under [DEFAULT]:
banaction = nftables-multiport
banaction_allports = nftables-allports
Verify nftables is active:
sudo nft list ruleset
After Fail2ban bans an IP, you can confirm the ban rule exists in the nftables ruleset:
sudo nft list ruleset | grep 203.0.113
If you’re on a system that still has the iptables-nft shim installed, the default iptables banaction will work fine. But switching to the native nftables actions is cleaner and avoids confusion when you’re also managing nftables rules directly.
Email Alerts on Bans
If you want to be notified when Fail2ban bans an IP, you can use one of the built-in action profiles. Requires a working mail setup on the server (sendmail, postfix, or a lightweight SMTP relay like msmtp).
In your jail config, change the action:
# Basic ban only:
action = %(action_)s

# Ban + email notification:
action = %(action_mw)s

# Ban + email with relevant log lines:
action = %(action_mwl)s
Set your destination address in [DEFAULT]:
destemail = you@example.com
sender    = fail2ban@yourserver.com
The %(action_mwl)s option sends the log lines that triggered the ban, which is useful for understanding what hit you.
Persistent Bans Across Reboots
By default, bans are stored in memory. A server reboot clears them all. To make bans survive reboots, enable the persistent database:
In jail.local under [DEFAULT]:
dbfile   = /var/lib/fail2ban/fail2ban.sqlite3
dbpurgeage = 7d
dbpurgeage controls how long old ban records stay in the database. Seven days is a reasonable default. The database also powers the recidive jail, so this setting matters if you’re using recidive.
Note: On Debian 12+, Ubuntu 22.04+, Fedora 38+, and other recent distributions, the SQLite database is enabled by default. You can verify by checking whether /var/lib/fail2ban/fail2ban.sqlite3 already exists. If it does, you only need to adjust dbpurgeage if the default doesn’t suit your needs.
Viewing Live Ban Activity in Logs
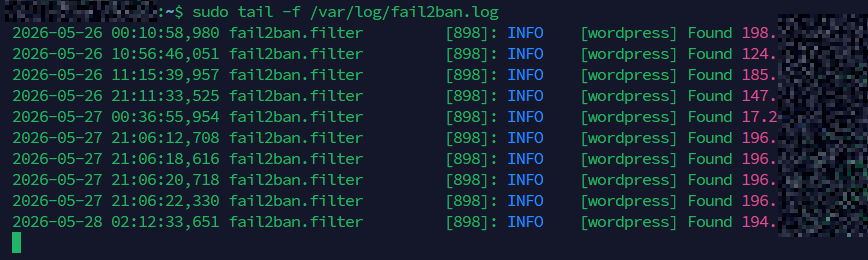
Fail2ban logs to /var/log/fail2ban.log on most systems. You can also tail it directly:
sudo tail -f /var/log/fail2ban.log
Or use journalctl if your system routes logs through systemd:
sudo journalctl -u fail2ban -f
A live stream of bans is surprisingly satisfying to watch. Within minutes on a fresh server, you’ll see exactly how much noise is out there.
Fail2ban with firewalld (RHEL/Fedora/Rocky)
On systems using firewalld instead of raw iptables, Fail2ban works fine but needs the right backend configured.
In jail.local under [DEFAULT]:
banaction = firewallcmd-rich-rules
banaction_allports = firewallcmd-allports
Verify firewalld is running before enabling jails:
sudo systemctl status firewalld
The firewallcmd-rich-rules action uses firewall-cmd --add-rich-rule to add bans, which integrates cleanly with the rest of your firewall rules. This is the right approach on RHEL-family systems rather than mixing iptables commands with firewalld.
A Practical Starting Config
Here’s a complete /etc/fail2ban/jail.d/custom.conf that covers the most common use cases for a typical Linux server. Use it as a starting point and tune from there.
[DEFAULT]
bantime   = 2h
findtime  = 10m
maxretry  = 5
ignoreip  = 127.0.0.1/8 ::1
dbfile    = /var/lib/fail2ban/fail2ban.sqlite3
dbpurgeage = 7d

[sshd]
enabled  = true
port     = ssh
logpath  = %(sshd_log)s
backend  = %(sshd_backend)s
maxretry = 3
bantime  = 6h

[nginx-http-auth]
enabled  = true
logpath  = %(nginx_error_log)s
maxretry = 4

[nginx-limit-req]
enabled  = true
logpath  = %(nginx_error_log)s
maxretry = 10

[recidive]
enabled  = true
logpath  = /var/log/fail2ban.log
bantime  = 1w
findtime = 1d
maxretry = 5
After saving, reload and check status:
sudo fail2ban-client reload
sudo fail2ban-client status
What Fail2ban Doesn’t Do
Fail2ban is reactive, not preventive. It bans IPs after they’ve already made several attempts. A few things it won’t handle on its own:
- Distributed brute-force attacks from thousands of different IPs (each making only 1-2 attempts)
- Zero-day exploits that don’t produce log entries
- Application-layer attacks that don’t fail authentication
For layered protection, combine Fail2ban with SSH key authentication (disable password auth entirely), a properly configured firewall, and regular log reviews. If you’re running a VPS, also check whether your host’s environment is contributing to the noise. Some VPS providers’ shared infrastructure attracts more scanning activity than others.
Also worth pairing with Fail2ban: tuning your system limits so Fail2ban itself doesn’t hit file descriptor limits under heavy ban activity on busy servers.
Quick Reference: Most-Used Commands
sudo fail2ban-client status– list all jailssudo fail2ban-client status sshd– status of a specific jailsudo fail2ban-client set sshd banip 1.2.3.4– manually ban an IPsudo fail2ban-client set sshd unbanip 1.2.3.4– unban an IPsudo fail2ban-client reload– reload config after changessudo fail2ban-regex /var/log/auth.log /etc/fail2ban/filter.d/sshd.conf– test a filtersudo tail -f /var/log/fail2ban.log– watch bans live
Conclusion
Fail2ban is one of those tools that earns its place on every internet-facing Linux server. The default install takes about five minutes, and even with minimal tuning, it cuts down a huge amount of noise from SSH scanners and web probes.
The part that makes the most difference in practice: set a sensible bantime (the default 10-minute ban is nearly useless), always add your IP to ignoreip before enabling jails, and turn on the recidive jail. Those three steps alone will dramatically improve how well Fail2ban protects your Linux server versus a stock install.
Have a Fail2ban config tip that’s made a real difference on your servers? Drop it in the comments.


Another tip:
Cloudflare + Fail2ban combo - If the server sits behind Cloudflare, logpath IPs will all be Cloudflare’s ranges unless you restore the original visitor IP (via mod_remoteip for Apache or real_ip_module for Nginx).
You can then connect via Cloudflare API to also pass banned IPs to your Cloudflare block list:
Definitely. I use
fail2banon my servers.Yes indeed. It is really helpful. There’s the approach for example where we admins can move or close ports, or, we can run things on the popular ports like port 22 and permanently block offenders. I think the latter is arguably better to block as soon as mal intent is detected than trying to evade. Of course nothing is absolute, and both approaches need to be balanced out, but in general, I prefer that more aggressive posture.
That approach is used here for our forums as well, not just fail2ban but also with Cloudflare’s WAF. More aggressive filtering to keep the noise down, save bandwidth, have much easier to read logs and less false positive blocks.