netcat (nc) Command in Linux, with Examples
The nc command, short for netcat, is one of those tools that looks simple at first and keeps surprising you the longer you use it. It reads and writes data across network connections using TCP or UDP, which sounds straightforward until you realize how many problems that actually solves. Port testing, file transfers, banner grabbing, reverse shells, proxies, debugging network services. All with one tool that ships on almost every Linux system.
I use nc regularly during server troubleshooting. It cuts out the noise fast. Is the port open? Is something actually listening? Is the firewall blocking it? nc answers those questions in seconds without needing a dedicated tool for each one.
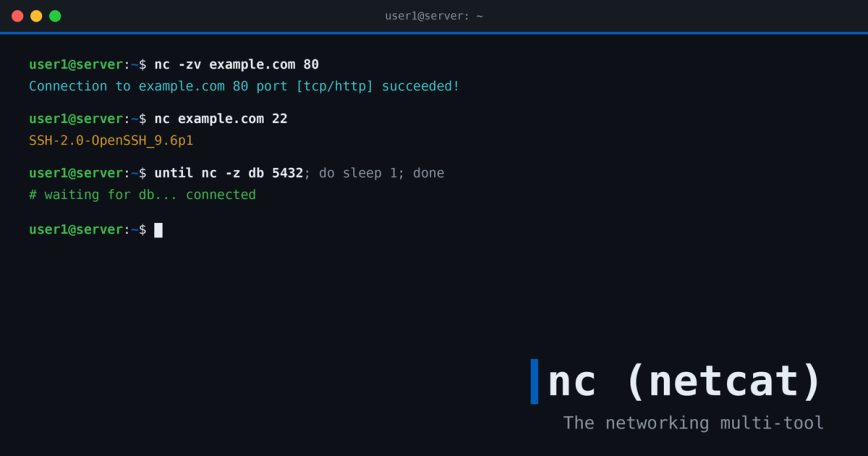
This guide covers real, practical usage. Not every flag in the man page, just the ones that matter.
Install netcat
Most distributions already have some version of netcat installed. There are a few variants: netcat-openbsd and netcat-traditional are the two most common on Debian-based systems. On Red Hat-based systems, ncat from the nmap project is often the default.
To install on Ubuntu/Debian:
sudo apt install netcat-openbsd
On Fedora/RHEL/CentOS:
sudo dnf install nmap-ncat
On Arch Linux:
sudo pacman -S openbsd-netcat
Check what version you have and what binary name it uses:
nc --version
which nc
which ncat
Note: The OpenBSD variant and traditional netcat differ in some flags. This guide uses the OpenBSD variant (nc), which is the most widely available. ncat from nmap is generally compatible but has some extra features of its own.
One thing that trips people up: nc is a command name, not a single program. On any given machine it might be OpenBSD netcat, Ncat from the Nmap project, BusyBox, or traditional netcat. They mostly behave the same for basic use, but some flags differ, and a few are missing entirely depending on which one you have. BusyBox is the one to watch for. It ships in Alpine, most container images, and a lot of routers, and its nc is heavily stripped down, so options like -z, -k, and -U may not be there at all. When in doubt, run nc --version or check the binary as shown above, then confirm your flags against man nc.
Basic Syntax
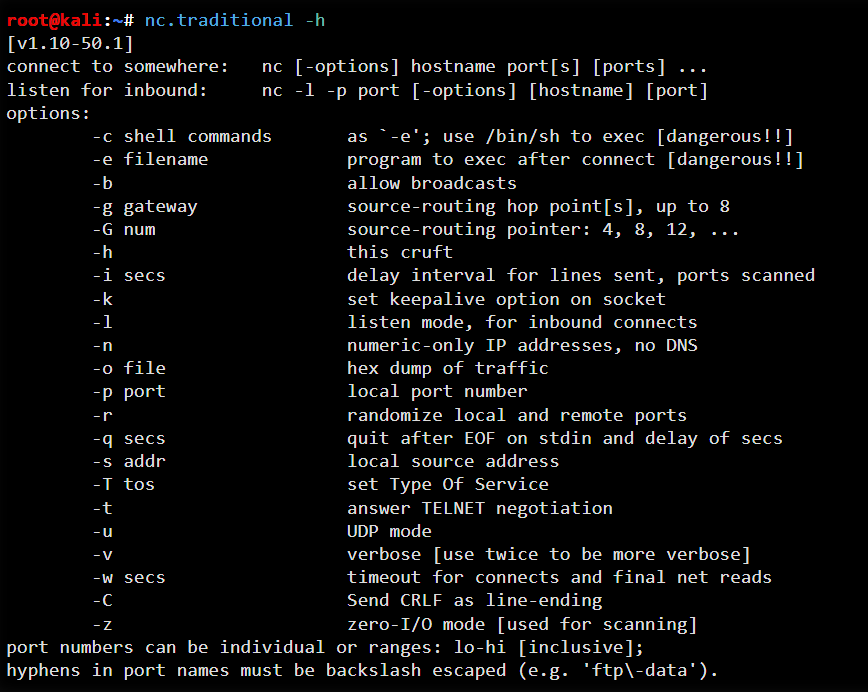
nc [options] host port
Or to listen:
nc -l [port]
That is the full core of it. Everything else is built on top of those two modes: connect to something, or listen for something.
Note that listen syntax is one of the things that varies by implementation. The OpenBSD variant used here takes nc -l 8080. BusyBox and traditional netcat often want the port passed with -p instead, as nc -l -p 8080. If a listener refuses to start, try the -p form.
Test If a Port Is Open
This is the thing I use nc for most often. You need to know if a port is open and accepting connections, without installing anything extra.
nc -zv example.com 80
The -z flag means zero-I/O mode: connect and immediately close. The -v flag gives verbose output so you can see what happened.
Output when the port is open:
Connection to example.com 80 port [tcp/http] succeeded!
Output when the port is closed or filtered:
nc: connect to example.com port 80 (tcp) failed: Connection refused
You can scan a range of ports too:
nc -zv example.com 20-25
This is useful for quickly checking which ports in a range are open. It is not a replacement for nmap when you need thorough scanning, but for quick checks it gets the job done. See the guide to network troubleshooting in Linux for more tools you can combine with this.
Test UDP Ports
By default nc uses TCP. Add -u to switch to UDP:
nc -zvu example.com 53
UDP testing is less reliable than TCP because there is no handshake. A non-response does not definitively mean the port is closed. But it is still useful for services like DNS, SNMP, or NTP where you want a quick check.
Set a Connection Timeout
By default, nc will wait a long time when connecting to a filtered port. Use -w to set a timeout in seconds:
nc -zv -w 3 example.com 443
This gives up after 3 seconds instead of hanging. Very useful in scripts where you do not want to wait indefinitely.
Transfer Files Over the Network
This is one of those capabilities that surprises people. You do not need scp or rsync for a quick one-off transfer if nc is available on both ends. It is not encrypted, so only use this on trusted networks.
On the receiving machine (start listening first):
nc -l 9999 > received_file.tar.gz
On the sending machine:
nc receiving-host-ip 9999 < file_to_send.tar.gz
The file transfers and then the connection closes. Simple and fast. For transferring a whole directory, combine it with tar:
On the receiver:
nc -l 9999 | tar xzvf -
On the sender:
tar czvf - /path/to/directory | nc receiving-host-ip 9999
Note: For anything sensitive, use SSH-based file transfers instead. Netcat sends data in plaintext.
Chat Between Two Machines
This sounds like a toy feature but it is actually handy when you are troubleshooting network connectivity between two machines and want to confirm bidirectional communication is working.
On machine A (listener):
nc -l 5555
On machine B (connector):
nc machine-a-ip 5555
Now you can type on either end and it appears on the other. Ctrl+C or Ctrl+D closes the connection. It confirms that both TCP direction and the port are fully functional end-to-end.
Grab a Service Banner
Many services send a banner when you connect. You can grab that banner with nc to check the software version, confirm the service is running, or identify what is listening on a port.
Connect to an SSH server:
nc example.com 22
You will get something like:
SSH-2.0-OpenSSH_8.9p1 Ubuntu-3ubuntu0.6
Connect to an SMTP server:
nc mail.example.com 25
220 mail.example.com ESMTP Postfix (Ubuntu)
Connect to an HTTP server and send a raw request:
nc example.com 80
GET / HTTP/1.0
Host: example.com
(Press Enter twice after the Host line to send the request.)
You will get back the full HTTP response headers and body. This is useful for checking what a server returns before involving a browser or curl.
This only works on plaintext ports. Point plain nc at an HTTPS service on port 443 and you will get an encrypted handshake back, which looks like garbage on your terminal. To talk to a TLS service by hand, use ncat with the --ssl flag:
ncat --ssl example.com 443
Then type your raw request as before. If ncat is not installed, openssl s_client -connect example.com:443 does the same job.
Test a Local Service
You do not need a remote host. You can connect to services running locally too. Testing a web server running on a non-standard port, checking that a database is listening, verifying an app started correctly:
nc -zv localhost 3306
nc -zv 127.0.0.1 8080
This pairs well with VPS benchmarking and testing when you want to confirm services are reachable before running heavier tests. If you want to see everything currently listening on the machine first, the ss command lists open sockets and the processes behind them.
Test a Unix Socket
Not every service listens on a TCP port. A lot of them, PHP-FPM, Docker, database sockets, listen on a Unix domain socket instead. The OpenBSD variant and ncat can connect to those with -U:
nc -U /run/php/php-fpm.sock
Or the Docker daemon socket:
nc -U /var/run/docker.sock
This is handy when you need to confirm a socket exists and accepts connections before pointing an application at it. Note that -U is not available in BusyBox netcat, so this one depends on which implementation you have.
Create a Simple TCP Server for Testing
You can spin up a listener that echoes back a test response. This is useful when you are building a client application and want something simple to connect to.
Listen and send a message to every client that connects:
echo "hello from server" | nc -l 8888
From another terminal or machine:
nc server-ip 8888
The client receives the message and the connection closes. The listener exits after one connection. To keep it running in a loop (with traditional or ncat):
while true; do echo "hello" | nc -l 8888; done
Wait for a Service to Come Up
This one shows up constantly in container setups. You need to hold off starting an application until the thing it depends on, a database, a message queue, is actually accepting connections. The -z flag makes this a one-liner:
until nc -z database 5432; do
  echo "waiting for database..."
  sleep 1
done
The loop keeps testing port 5432 on the host named database and only continues once the connection succeeds. You will find some version of this in a huge number of Docker entrypoint scripts, where a web app has to wait for Postgres or MySQL to finish starting. Add a -w timeout if you want it to give up eventually rather than loop forever.
Keep the Listener Open: -k Flag
The OpenBSD variant of nc supports -k to keep listening after a client disconnects:
nc -lk 8888
This is more useful for testing multiple connections without restarting the listener each time. Note that -k is not available in all variants of netcat.
Proxy Traffic with netcat
You can chain two nc instances together to create a basic TCP proxy. Traffic hits one port and gets forwarded to another host and port.
mkfifo /tmp/ncpipe
nc -l 8080 < /tmp/ncpipe | nc real-server.com 80 > /tmp/ncpipe
The named pipe connects the output of the listener to the input of the outbound connection and vice versa. This is a debugging technique, not something you would run in production. But it is genuinely useful when you need to intercept or inspect traffic in a pinch.
Check Network Throughput (Quick and Dirty)
You can get a rough idea of raw TCP throughput between two machines using nc and /dev/zero. This is not a replacement for iperf3, but it works in a pinch.
On the receiver, watch throughput with pv (pipe viewer):
nc -l 9998 | pv > /dev/null
On the sender:
nc receiver-ip 9998 < /dev/zero
pv will show real-time throughput. Install it with sudo apt install pv or sudo dnf install pv if it is not already present.
Useful Flags Reference
-l– Listen mode. Wait for an incoming connection instead of initiating one.-v– Verbose. Show connection status and other info.-z– Zero I/O mode. Scan without sending data. Used for port checking.-u– Use UDP instead of TCP.-w seconds– Timeout. Give up after this many seconds.-k– Keep listening after client disconnects (OpenBSD variant).-n– Skip DNS resolution. Use numeric IPs only.-p port– Specify the local source port.-e command– Execute a command after connecting (not available in all variants).-4/-6– Force IPv4 or IPv6.
A Few Real-World Scenarios
Check if a firewall rule is blocking a port
Set up a listener on the server:
nc -l 9000
Try to connect from the client:
nc -zv server-ip 9000
If it connects, the port is open through the firewall. If it hangs or refuses, something is blocking it. This is often the fastest way to confirm a firewall rule change worked before deploying an application.
Verify a database port is reachable from the app server
nc -zv -w 3 db-server-ip 5432
If this fails from your app server but succeeds from the database server itself, the network or firewall is the issue, not the database configuration.
Debug a slow connection
Connect and time how long the handshake takes:
time nc -zv -w 5 example.com 443
If the connection is slow to establish, it points to DNS resolution delay, routing issues, or a slow server response rather than an application problem. Combine this with traceroute for a fuller picture.
Test outbound connectivity from a restricted server
Sometimes you need to confirm a server can reach the outside world on a specific port. For example, checking that a server can reach an external SMTP relay on port 587:
nc -zv -w 5 smtp.mailprovider.com 587
If this fails but port 25 works, you know the outbound firewall is filtering port 587 specifically.
Limitations to Know
Netcat is not encrypted. Do not use it for sensitive data transfers on untrusted networks. It is also not a full-featured port scanner. For serious scanning, use nmap. And the feature set varies between implementations: the OpenBSD variant, traditional netcat, and ncat from nmap each have slightly different flags and capabilities. If a flag does not work, check which variant you have installed.
Also, some security-hardened systems disable or remove nc entirely, or restrict the -e flag (which can execute commands). That is intentional. The same power that makes nc useful for debugging makes it something that security teams watch for.
You may have noticed this guide does not cover reverse shells, which are the use netcat is most infamous for. That is deliberate. The same -e techniques show up far more often in intrusions than in legitimate administration, so there is little reason to spell them out here. Everything above is aimed at testing, transferring, and troubleshooting, which is what most of us actually reach for nc to do.
One more thing worth knowing: everything here works over IPv6 too. Force it with -6 when a host resolves to both:
nc -6 -zv example.com 443
Summary
The nc command earns its place in the toolkit by being genuinely useful across a wide range of tasks without requiring anything special. Port testing, file transfers, service banner grabbing, connectivity debugging. It is not glamorous but it solves real problems fast.
For a broader look at what Linux has to offer for network diagnostics and monitoring, the network troubleshooting guide covers the full stack of tools worth knowing. And if you want to go deeper on benchmarking network performance between machines, the Linux benchmark scripts and tools article covers iperf and others.
Run man nc on your system to check the specific flags available for your installed variant. What you get depends on which implementation is installed, and the differences matter.