Linux swap Commands: Create and Manage Swap Files/Partitions
Swap space is one of those topics that over the years, I’ve been able to understand how to get the best of it slowly over time and mostly by getting it wrong first. It has not helped that the kernel changed how swap behaves more than once in the past decade, and that some distros now ship with zram or zswap already enabled.
So for this article, I’m not going into the concept itself, but the mechanics. Like, how do you add swap? How do you remove it? What’s the difference between a swap file and a swap partition? And what do swapon, swapoff, and mkswap do under the hood?
I’ve probably already written this topic to death. To the point where, well, here’s a list of all the swap related articles: Linux Performance: Almost Always Add Swap Space | Linux Performance: Almost Always Add Swap Space – Part 2: ZRAM | Linux Performance – Part 3: No Swap Space | Linux Kernel Parameters Tuning for Better Performance | How to Set Up Hibernation on Linux (Swap Done Right) | Diagnosing Swap Usage with smem on Linux | I was wrong! zswap IS better than zram.
I have been adding swap files to VPS instances for years and the process has not changed much, but a few of the gotchas (Btrfs, swapoff hanging, fstab typos) still catch people. So this guide covers swap management commands you can run right now.
swapon, swapoff, and mkswap: The Core Commands
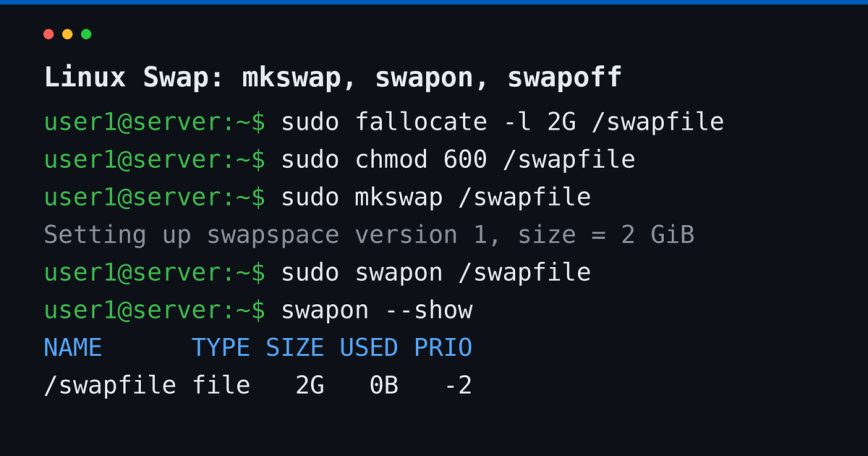
Three commands do most of the work:
mkswap: initializes a file or block device as a Linux swap areaswapon: activates a swap file or partitionswapoff: deactivates a swap file or partition
You will almost always use them in that order. Format, then enable, then optionally disable.
Check Current Swap Usage
Before you add or remove anything, check what you already have:
swapon --show
Example output:
NAME      TYPE SIZE USED PRIO
/dev/sda2 partition   2G 128M   -2
Or use free -h for a quick summary:
free -h
              total        used        free      shared  buff/cache   available
Mem:           7.7G        2.1G        3.4G        210M        2.1G        5.1G
Swap:          2.0G        128M        1.9G
If the swapon --show output is empty, you have no active swap. Let’s fix that.
Option 1: Create a Swap File (Recommended for Most Setups)
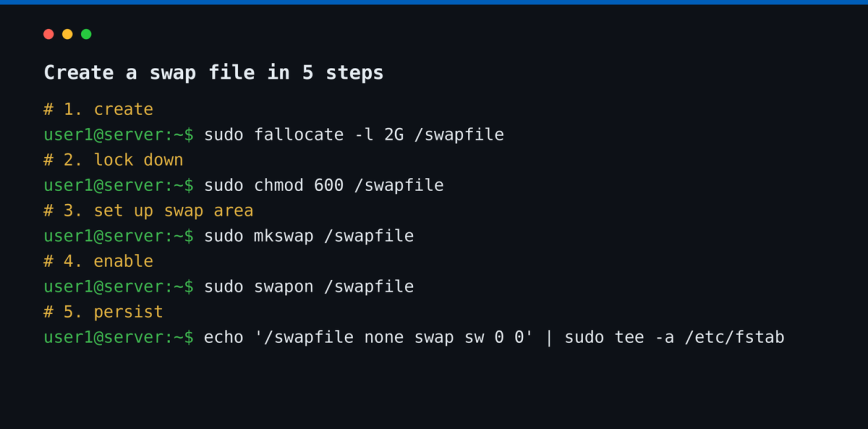
Swap files are flexible. You can add them to any existing filesystem without repartitioning. This is the approach I use on most of my servers and VPS instances because you can resize or remove them without touching disk layout.
Step 1: Create the File
Use dd or fallocate to create the file. fallocate is faster:
sudo fallocate -l 2G /swapfile
If fallocate is not available, or swapon later complains about holes in the file, fall back to dd. This bites on XFS with older kernels (pre-4.18, so RHEL 7 era) where fallocate leaves unwritten extents that swapon rejects with “Invalid argument”. dd from /dev/zero is the most portable method on any filesystem:
sudo dd if=/dev/zero of=/swapfile bs=1M count=2048 status=progress
Note: Btrfs is the special case. Swap files there need copy-on-write disabled, no compression, full preallocation, and must not live on a subvolume that gets snapshotted. The filesystem also has to be a single device with a single data profile (no RAID). A plain fallocate on a normal copy-on-write file will not meet those requirements. On btrfs-progs 6.1 or newer, let the tool handle it: sudo btrfs filesystem mkswapfile --size 2g /swapfile. On older versions, run sudo truncate -s 0 /swapfile && sudo chattr +C /swapfile first, then the dd command above. See the Btrfs swapfile documentation for the full list of restrictions.
Step 2: Secure the Permissions
Swap files should only be readable by root. Tighten the permissions immediately after creation:
sudo chmod 600 /swapfile
Verify:
ls -lh /swapfile
-rw------- 1 root root 2.0G Jan 15 09:12 /swapfile
Shortcut: util-linux 2.41 and newer can do steps 1 through 3 in one go with sudo mkswap --file --size 2G /swapfile. It creates the file, sets 0600 permissions, and sets NOCOW on Btrfs. I still show the manual steps because most LTS distros ship an older util-linux, and it helps to know what each step does when something breaks.
Step 3: Format as Swap
sudo mkswap /swapfile
Output:
Setting up swapspace version 1, size = 2 GiB (2147479552 bytes)
no label, UUID=a1b2c3d4-e5f6-7890-abcd-ef1234567890
Ignore the UUID for a swap file. You reference a swap file by its path in /etc/fstab. The UUID matters for swap partitions, which we get to below.
Step 4: Enable the Swap File
sudo swapon /swapfile
Confirm it is active:
swapon --show
NAME      TYPE  SIZE USED PRIO
/swapfile file    2G   0B   -2
Step 5: Make It Persistent Across Reboots
Without an /etc/fstab entry, the swap file will not be active after a reboot. Open the file with your editor:
sudo nano /etc/fstab
Append this line, save, and exit:
/swapfile none swap sw 0 0
Then verify the entry works. mount -a skips swap lines, so use swapon instead:
sudo swapoff /swapfile
sudo swapon -a
swapon --show
If /swapfile shows up in the list, the fstab entry is good.
Option 2: Create a Swap Partition
Swap partitions are common on fresh installs, especially on dedicated servers where disk layout is planned in advance. The kernel maps swap file extents directly and bypasses the filesystem for the actual I/O, so there is no meaningful performance gap between the two on a modern kernel. The choice is about manageability and filesystem support.
If you have an unpartitioned disk or a spare partition (for example, /dev/sdb1), format it as swap:
sudo mkswap /dev/sdb1
Then enable it:
sudo swapon /dev/sdb1
For /etc/fstab, use the UUID (more reliable than device names, which can shift):
sudo blkid /dev/sdb1
/dev/sdb1: UUID="a1b2c3d4-e5f6-7890-abcd-ef1234567890" TYPE="swap"
Add to /etc/fstab:
UUID=a1b2c3d4-e5f6-7890-abcd-ef1234567890 none swap sw 0 0
Disabling and Removing Swap
There are times you need to remove swap. Maybe you are resizing the file, migrating to ZRAM, or troubleshooting swap-related performance issues.
Disable Active Swap
sudo swapoff /swapfile
Or to disable all swap at once:
sudo swapoff -a
Note: swapoff moves all pages currently in swap back into RAM. If there is not enough free memory to hold them, swapoff fails with an out-of-memory error (exit status 2 on current util-linux) or sits there for a long time trying. Check available RAM first with free -h, and if you are tight, add a temporary second swap file before removing the first.
Remove the Swap File
After disabling, delete the file and remove the /etc/fstab entry:
sudo rm /swapfile
Then edit /etc/fstab and remove or comment out the swap line.
Resizing an Existing Swap File
You cannot resize a swap file while it is active. The process is: disable, delete, recreate, re-enable.
sudo swapoff /swapfile
sudo rm /swapfile
sudo fallocate -l 4G /swapfile
sudo chmod 600 /swapfile
sudo mkswap /swapfile
sudo swapon /swapfile
The /etc/fstab entry does not need to change since the path stays the same.
Multiple Swap Areas and Priority
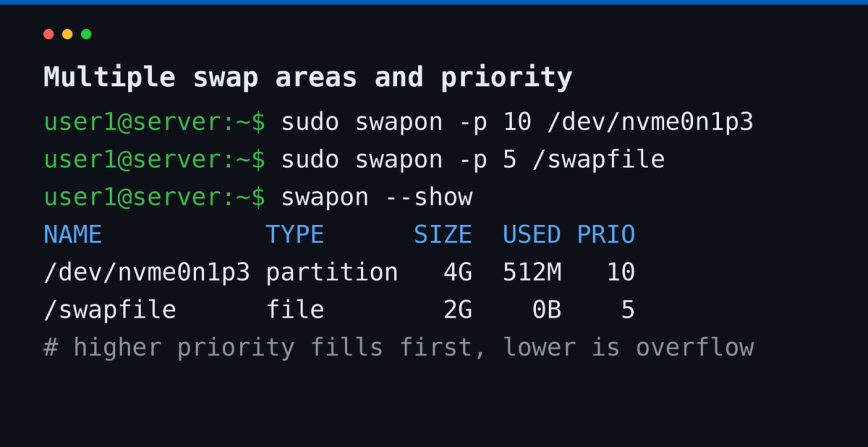
Linux supports multiple swap areas simultaneously. This is useful if you want to use both a swap file and a swap partition, or spread swap across multiple drives for better I/O performance.
Each swap area has a priority. Higher priority swap fills up first. You set priority with the -p flag:
sudo swapon -p 10 /dev/nvme0n1p3
sudo swapon -p 5 /swapfile
In this example, the NVMe partition fills first (priority 10), and the swap file acts as overflow (priority 5). Swap areas enabled without -p get negative priorities assigned automatically (which is why you see -2 in the earlier output), so anything you set explicitly outranks them.
In /etc/fstab, set priority with the pri option:
/dev/nvme0n1p3 none swap sw,pri=10 0 0
/swapfile      none swap sw,pri=5  0 0
Check all active swap areas and their priorities:
swapon --show
NAME           TYPE      SIZE  USED PRIO
/dev/nvme0n1p3 partition   4G  512M   10
/swapfile      file        2G    0B    5
Tuning Swap Behavior with vm.swappiness
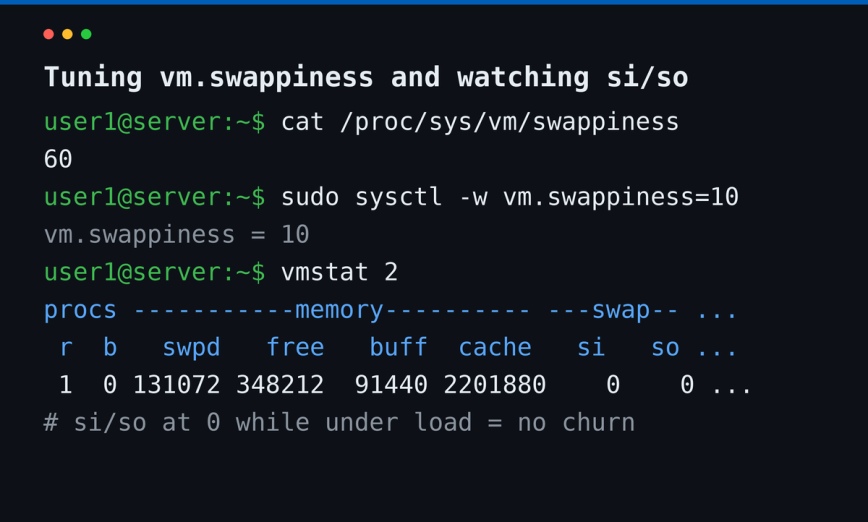
Once swap is working, you can optionally tune how aggressively Linux uses it. The Linux kernel’s vm.swappiness sets the relative cost of swapping anonymous pages versus dropping filesystem cache. The default is 60, which is higher than most server workloads need, but the right value depends on what the box is doing. It is one of several kernel parameters worth adjusting on a fresh server.
Check the current value:
cat /proc/sys/vm/swappiness
For a typical web or database server where I want the page cache kept warm, I start at 10 and adjust from there based on what vmstat shows:
sudo sysctl -w vm.swappiness=10
Make it persistent with a drop-in file (this survives package upgrades better than editing /etc/sysctl.conf directly):
echo "vm.swappiness=10" | sudo tee /etc/sysctl.d/99-swappiness.conf
sudo sysctl --system
A value of 10 tells the kernel to prefer keeping data in RAM and only swap when it has to. Values range from 0 to 200 on kernel 5.8 and newer (0 to 100 on older kernels). 100 means equal cost. Anything above 100 tells the kernel swap I/O is cheaper than reclaiming page cache, which is mainly useful with in-memory swap like zswap or zram or very fast swap devices.
Note: Setting vm.swappiness=0 does not disable swap. It tells the kernel to avoid swapping as much as possible but will still swap to avoid out-of-memory conditions. To disable swap entirely, use swapoff -a.
Swap File vs. Swap Partition: Which Should You Use?
For most modern setups, swap files win on flexibility. Here is a quick comparison:
- Swap file: easy to create, resize, and remove. No repartitioning needed. Works on ext4 and XFS. Subject to filesystem restrictions (holes, copy-on-write) that partitions do not have.
- Swap partition: no filesystem restrictions to worry about. The safer choice on Btrfs if you do not want to deal with the swap file restrictions above, and required if you plan to hibernate on an older kernel.
On a VPS or cloud server where you control the filesystem and want flexibility, use a swap file. On a dedicated machine with a planned disk layout, a swap partition is fine.
Monitoring Swap Usage in Real Time
Once swap is set up, keep an eye on how it behaves. A few useful commands:
Check overall usage:
free -h
Watch swap activity in real time with vmstat:
vmstat 2
The si (swap in) and so (swap out) columns show pages moving in and out of swap per second. Some swap usage with si/so sitting at zero is normal: the kernel parked cold pages there and nobody is asking for them. Sustained non-zero values under load are the thing to watch. That means pages are churning in and out, which is a sign you need more RAM or a lower swappiness setting.
For a per-process view of swap usage, iotop or smem are both useful. smem specifically shows swap usage per process:
smem -s swap -r
You can also check per-process swap usage directly from /proc:
grep VmSwap /proc/*/status 2>/dev/null | sort -t: -k3 -rn | head -10
This lists the top 10 processes by swap usage. Useful when you need to identify what is eating your swap.
Common Issues and Fixes
swapon fails: “Invalid argument”
You likely skipped mkswap, or the file has holes in it (usually fallocate on Btrfs, or a sparse file copied from somewhere else). Recreate it with dd, or with btrfs filesystem mkswapfile on Btrfs, and rerun mkswap.
swapoff hangs
The system is trying to move swap pages back to RAM but does not have enough free memory. Either free up RAM first (kill memory-heavy processes), or add more swap space before running swapoff.
Swap not active after reboot
Check your /etc/fstab entry. A common mistake is a typo or missing the swap type field. Run sudo swapon --all --verbose after boot to see what gets activated and what fails.
Permission denied when creating swap file
Make sure you are using sudo for both the file creation and mkswap/swapon commands. Swap operations require root.
Quick Reference
swapon --show: list active swap areasfree -h: show total swap usagemkswap /path/to/file: format a file or partition as swapswapon /path/to/file: enable swapswapoff /path/to/file: disable swapswapoff -a: disable all swapswapon -a: enable all swap defined in/etc/fstabswapon -p PRIORITY /path: enable swap with a specific priorityvmstat 2: watch swap I/O in real time (si/so columns)
Conclusion
Managing swap on Linux comes down to three commands: mkswap, swapon, swapoff. Swap files are the practical choice for most modern setups, especially on VPS instances where you cannot repartition on the fly. Swap partitions still make sense on dedicated hardware with a planned disk layout.
Get your swap set up, add the /etc/fstab entry, consider lowering vm.swappiness if vmstat shows the page cache getting evicted, and then keep an eye on those si/so columns in vmstat. That covers 90% of it.