Enable Automatic Updates – Fedora/Red Hat + Bonus Tip
Linux server security is crucial to Linux server administration. Part of keeping Linux servers secure is installing security updates shortly after they become available. Too often, compromised servers are a result of pending security updates awaiting manual installation.
In general, for critical servers where you cannot afford unplanned downtime should be very careful with automatic updates. While there are reasons to be cautious, it is also worth considering. Let’s have a look at how to enable automatic security updates on Fedora and Red Hat.
Enable Automatic updates on RHEL 8 Fedora
On Red Hat Enterprise Linux (RHEL) 8 and Fedora, the dnf-automatic RPM package provides a service which is started automatically for automatic updates. The package can be configured to perform automatic updates to install updated packages and/or security updates.
If not already installed, run the following command:
dnf install dnf-automatic
Next, you’ll want to edit the config file:
vi /etc/dnf/automatic.conf
Here’s a screenshot excerpt of my dnf-automatic config file:
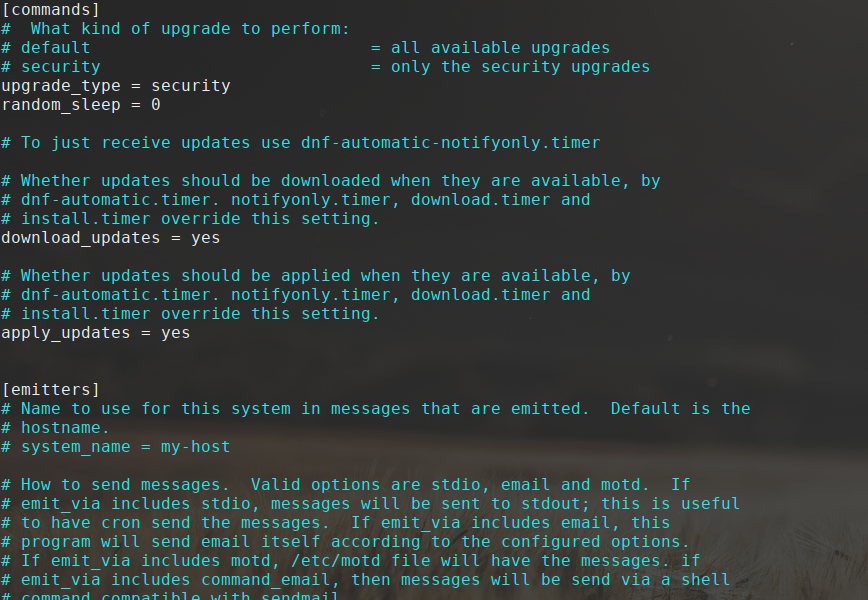
Once you are finished with the configuration, run the following command:
systemctl enable --now dnf-automatic.timer
this enables and starts the systemd timer. You may also use notifyonly.timer, download.timer or install.timer to override the download_updates = yes setting.
Enable Automatic updates on RHEL 7
On Red Hat Enterprise Linux (RHEL) 7 the yum-cron RPM package provides a service which is started automatically for automatic updates. We just need to edit the yum-cron configuration file first to enable it.
The yum-cron RPM is not installed by default; use the command below to install:
yum install -y yum-cron
Next, you’ll want to edit the config file:
vi /etc/yum/yum-cron.conf
Here’s a screenshot excerpt of my yum-cron config file:
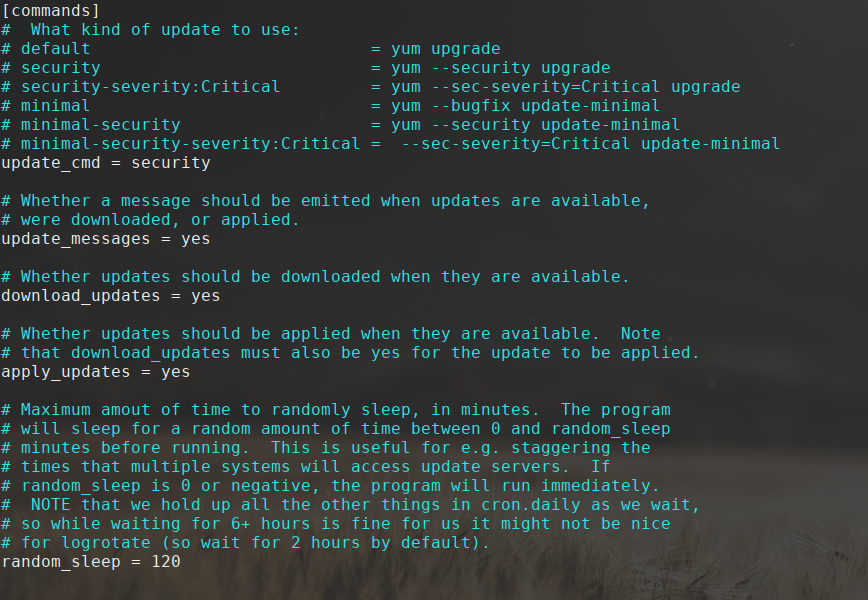
In that config file, change the line:
apply_updates = no
to
apply_updates = yes
Also, change the line:
update_cmd = default
to
update_cmd = security
the options available are:
# default = yum upgrade
# security = yum –security upgrade
# security-severity:Critical = yum –sec-severity=Critical upgrade
# minimal = yum –bugfix update-minimal
# minimal-security = yum –security update-minimal
# minimal-security-severity:Critical = –sec-severity=Critical update-minimal
Notice, in both examples above, I’ve enabled the automatic installation of security updates only. Also, no instructions have been included for Fedora releases prior to 29; please, make sure you upgrade to a currently supported version of Fedora server as your first step in server security!
Bonus tip for RHEL and Fedora
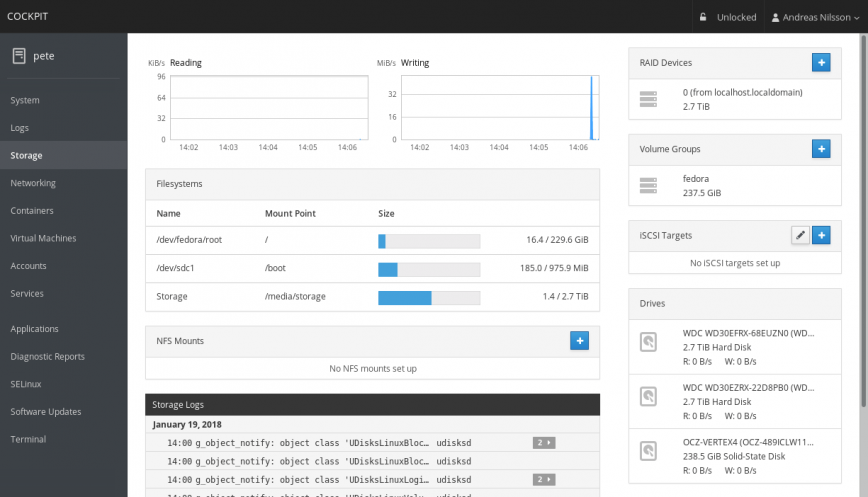
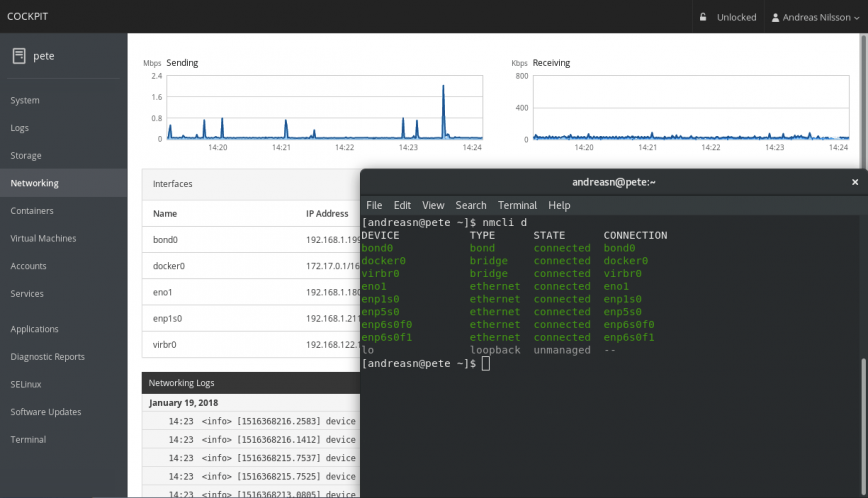
Manage your server(s) remotely and securely via the cockpit-project. An easy-to-use, integrated, glanceable and open web-based interface for your servers:
Published: November 14th, 2019 | Updated: July 09th, 2024