Boost Your Linux Command Line Productivity, Part 1
Welcome to the first part of a series of command line tips to boost your Linux productivity. The command line interface can be a lifesaver for those who work on these systems regularly. In this series, we will explore five ways to help you work faster and more efficiently on Linux servers (or Linux desktops) when using command line.
Linux Command Line Productivity Tips/Reminders
If you’re a beginner with Linux, these tips will come in handy. That said, whether you are a beginner or a more experienced Linux user who just needs a refresher, these five tips will help boost your efficiency and productivity when working with the Linux command line.
So, let’s dive in and start exploring the first five tips in this series!
1) Tab Completion

Tab completion is a feature in the command line interface that allows you to type the first few characters of a command or file name and then press the tab key to automatically complete the rest.
This can save you a lot of time and typing, especially when working with a long file or directory names. This feature works with both commands and file names, so you can use it to quickly navigate your file system or execute commands.
Here’s an example of using tab completion to complete a command:
ls /va<tab>
ls /var/
ls /var/ca<tab>
ls /var/cache/
And here’s an example of using tab completion to complete a file name:
ls myver<tab>
ls myverylongfilename.txt
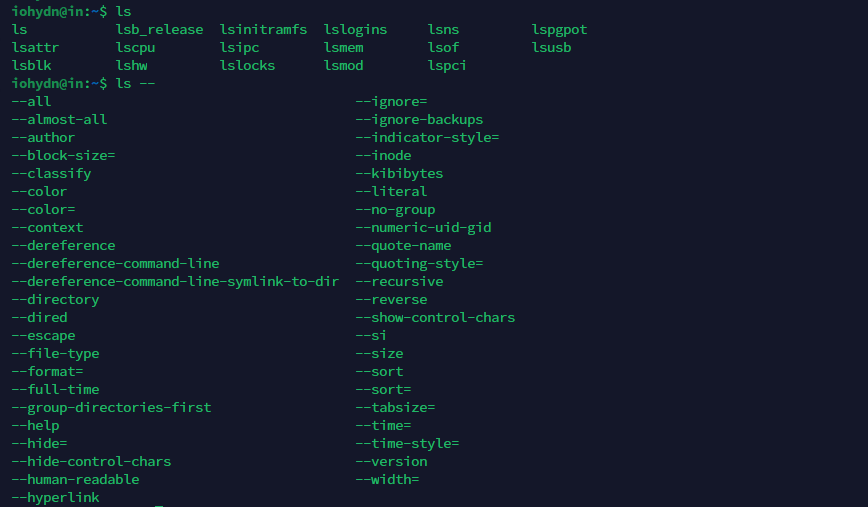
Did you know that it can also be used to complete options for commands? Here’s an example of how you can use tab completion to quickly access the options for the “ls” command. This feature can also be used when you’re unfamiliar with the options for a particular command, allowing you to easily explore and discover available options.
ls --<tab>
ls --all --color=auto --directory --full-time --group-directories-first --human-readable --si
Here are some of the commands that you can use with tab completion to make your work easier and more efficient:
cd, ls, mv, rm, cp, mkdir, rmdir, cat, grep, find, chmod, chown, ping, ps, top, kill, ssh, scp, tar, gzip.
Also, read 90 frequently used Linux Commands.
2) Aliases

An alias is a short form of a command that you can use instead of typing out the full command.
For example, instead of typing “ls -al” every time you want to list files in a directory, you could create an alias called “ll” that does the same thing.
To create an alias, you simply need to add a line to your shell configuration file, such as ~/.bashrc, like this: “alias ll=’ls -al'”. This will allow you to execute the “ll” command from the command line, which will run “ls -al” instead.
Here’s an example of creating an alias for the “ls -al” command:
alias ll='ls -al'
Now, you can use the “ll” alias to list the contents of a directory with the “-al” option:
ll
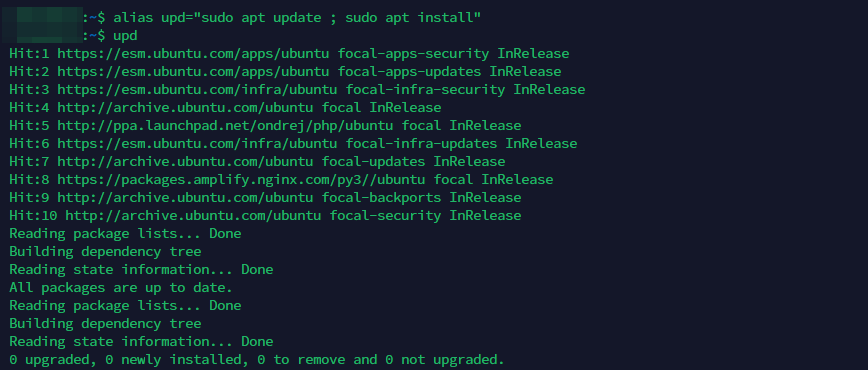
Another example. (see the above screenshot). I don’t like having to type sudo apt update ; sudo apt upgrade each time.
So I created an alias command named ‘upd’ like this:
alias upd="sudo apt update ; sudo apt install"
So now I can just type upd and hit Enter to update and upgrade Ubuntu.
You can do this for many commands that you use frequently. Use unalias to delete previously added aliases and alias -p to list all aliases.
For more alias ideas, see bash_aliases, topalias, and awesome-bash-alias.
3) Keyboard Shortcuts
![]()
Keyboard shortcuts are a great way to save time when working on the command line.
For example, you can use the up and down arrows for cycling through your command history, allowing you to quickly repeat previous commands.
You can also use the control + R (above screenshot) key combination to search through your command history, making it easy to find the command you need.
Additionally, the control + A and control + E keys allow you to move the cursor to the beginning and end of the line, respectively.
Here’s an example of using the up and down arrows to cycle through your command history:
ls
cd /var/www/html/
<up arrow>
ls
<down arrow>
cd /var/www/html/
Also, see Useful shortcuts for bash/zsh.
4) History Expansion
History expansion is a feature that allows you to reuse parts of previous commands, saving you time and effort.
For example, you can use the exclamation mark ! to repeat the last command, or you can use the history number (e.g. !123) to execute a specific command from your history.
Here’s an example of using the exclamation mark ! to repeat the last command:
ls
pwd
!ls
You can execute the last full ssh command that you ran by typing something like:
!ssh
You can also use the caret ^ symbol to repeat a command but with a different argument.
For example, if you previously ran “ls /path/to/file.txt”, you could use “^file^newfile” to run “ls newfile.txt”.
Here’s an example of using the caret ^ symbol to repeat a command with a different argument:
curl http://example.com/file.txt
^http^https
curl https://example.com/file.txt
Here’s an example of using the caret ^ symbol to repeat a command and change only the directory path:
rsync -av folder/ user@server:/path/folder/
^folder/^documents/
rsync -av documents/ user@server:/path/documents/
Also, see bash history cheat sheet.
5) Piping and Redirection
Piping and redirection are two powerful features that allow you to connect commands together, making it easy to process and manipulate data.
Piping allows you to take the output of one command and use it as the input for another command.
For example, you could use the “ls” command to list the contents of a directory and then pipe the output to the “grep” command to search for a specific file.
Here’s an example of using piping to take the output of one command and use it as the input for another command:
ls | grep file
Redirection allows you to redirect the output of a command to a file, or to read input from a file.
For example, you could use the “ls > list.txt” command to save the output of the “ls” command to a file called “list.txt”.
Here’s an example of using redirection to redirect the output of a command to a file:
ls > list.txt
Here’s another example of using the ps aux command to list all processes running on the system. The output is then piped | to the grep apache2 command, which filters the output to only show the processes related to the Apache web server. The filtered output is then piped to the awk '{print $2}' command, which extracts the second column (the process ID) from each line of the output. Finally, the extracted process IDs are piped to the xargs kill command, which sends a signal to each process to terminate it:
ps aux | grep apache2 | awk '{print $2}' | xargs kill
This example demonstrates how piping can be used to combine multiple commands and perform complex operations in a single line. By chaining commands together in this way, you can automate complex tasks and save time by avoiding the need to manually perform each step.
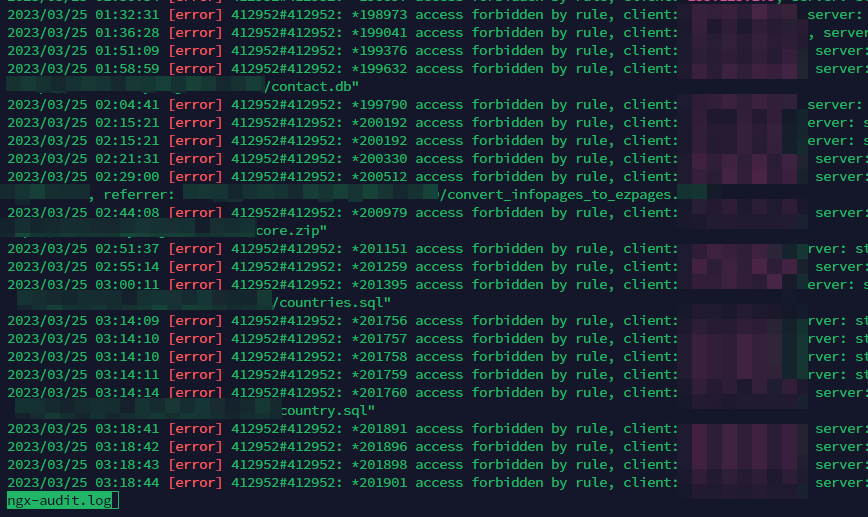
Finally, here’s an example of using piping and redirection together. The cat /var/log/nginx/error.log command is used to print the contents of the Nginx error log file. The output is then piped | to the grep "access forbidden" command, which filters the output to only show lines that contain the phrase “access forbidden”. The filtered output is then redirected > to the file ngx-audit.log:
cat /var/log/nginx/error.log | grep "access forbidden" > ngx-audit.log
This example demonstrates how redirection can be used to store the output of a command in a file, allowing you to save and review the results at a later time. By using redirection, you can also modify the output of a command before storing it in a file, which can be useful for processing and analyzing large amounts of data.

Screenshot of the contents generated from the above example command.
Conclusion
These five time-saving command line tricks can help you work faster and more efficiently on Linux servers. By using tab completion, aliases, keyboard shortcuts, history expansion, and piping and redirection, you can streamline your workflow and get more done in less time.
In the next part of this blog post, we will explore some more command line tricks that can help you take your Linux productivity to the next level.
From working with regular expressions to using advanced shell scripting techniques, we will cover a range of topics that will help you streamline your workflow and get more done in less time. So, stay tuned for the next part of this series.
Great post!
I did not know about point 4. History Expansion.
That is a nice toolkit to have in personal experience.
Good article with some great tips to keep handy for regular command-line activity. I’ve been reading O’Reilly’s “Efficient Linux at the Command Line” and have learned a ton I didn’t know.
Guess I’ve been around a long time; I’ve used all five of the productivity boost commands in Part 1. Let’s see if the “trend” continues in parts 2 and 3!