Network Rack for Small Office (Build Guide)
Last week I walked into an empty 5 × 4 ft storage room. By the end of the week, that blank space held a fully functional network core designed to keep a small professional office online through power cuts, ISP hiccups, and future growth. If you run a home office or manage IT for a small office or business, this summary shows the workflow and gear that delivered a dependable network rack without blowing the budget.
Why Bother With a Proper Rack?
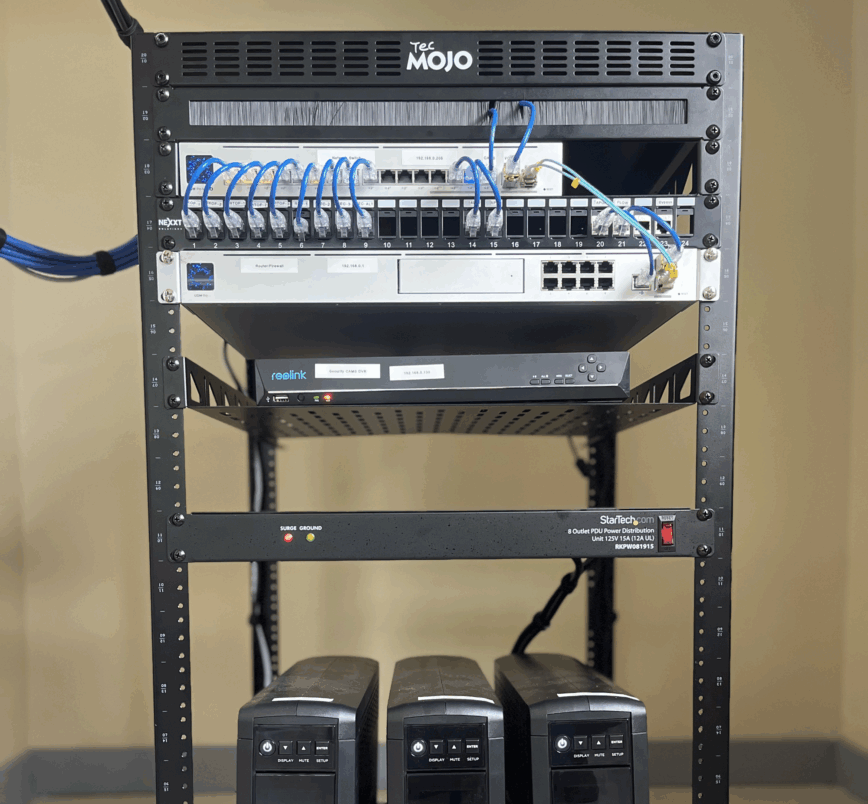
Sure, you can balance your router on a filing cabinet and call it a day until something goes wrong. A dedicated network rack, like this wheeled 20U frame, changes everything. Suddenly, your hardware is off the floor and easy to roll out of the way.
Instead of a mess of tangled cables, you’ve got clearly labeled patch leads. There’s plenty of space for UPS batteries, so your key services stay online even if the power goes out and the backup generator takes an hour to come online. And you’ve got room to grow. Whether it’s adding more PoE cameras, bringing in a second ISP, or adding a Linux server down the line.
If you’re still stacking your office network switch on top of your router, picking up a starter rack and spending half a day on cable dressing is probably the most satisfying weekend upgrade you can make.
Hardware at a Glance
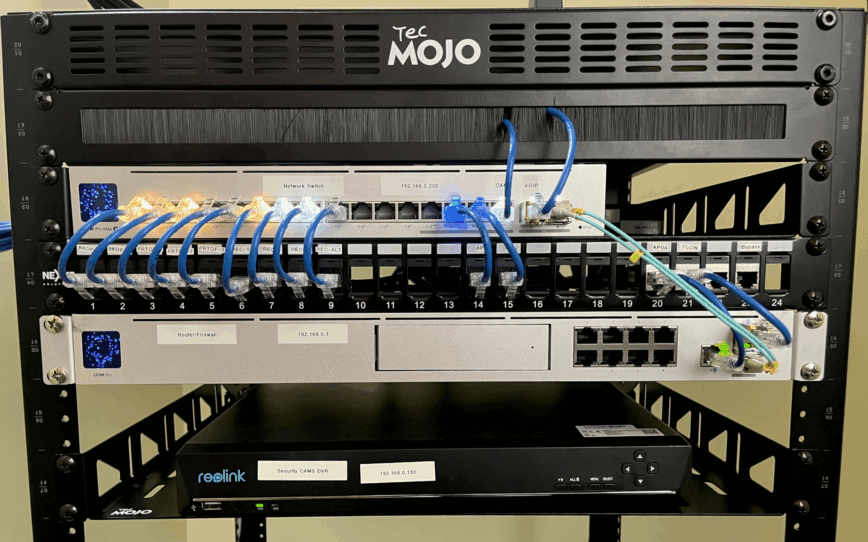
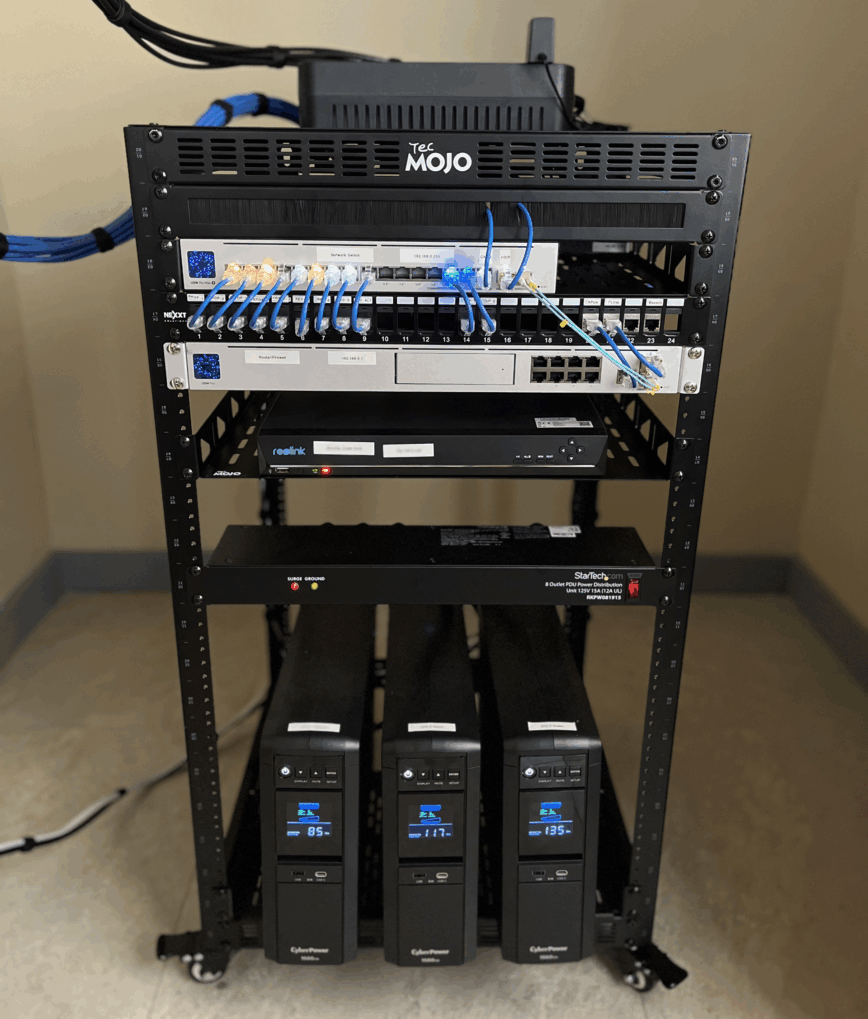
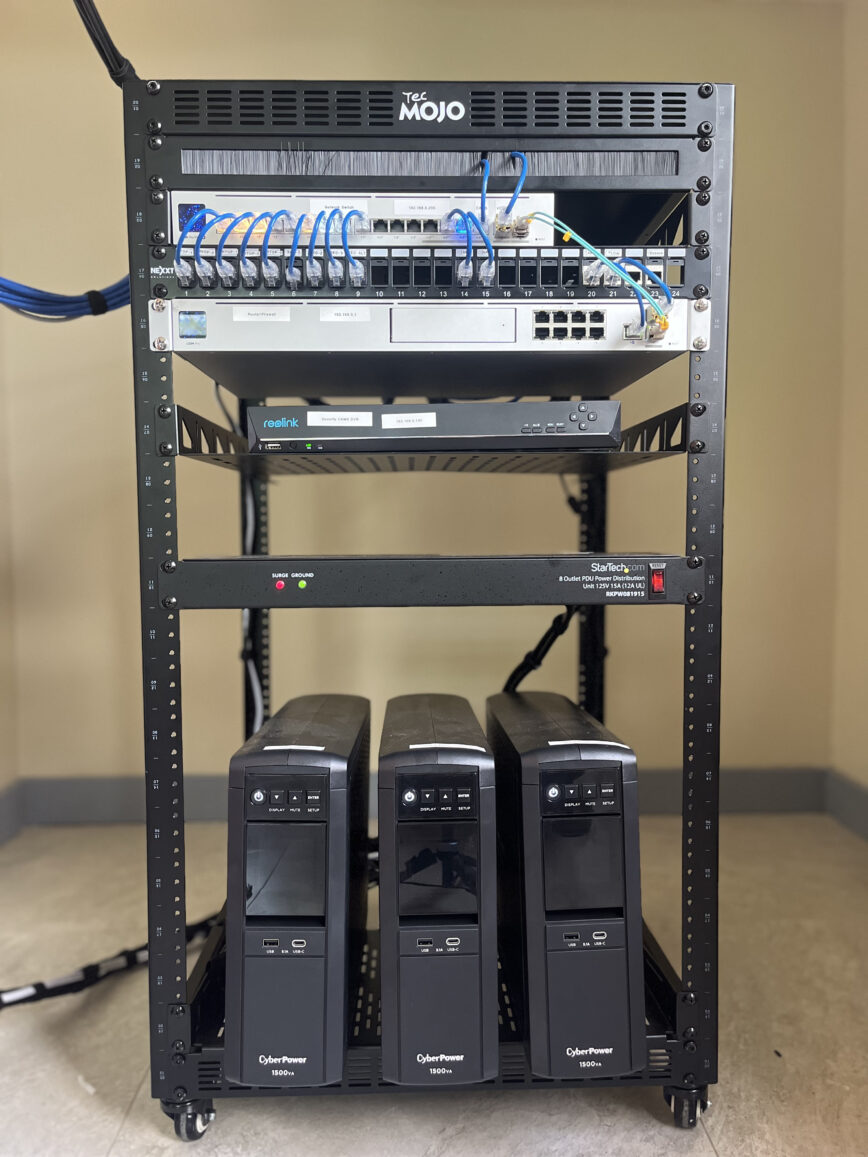
- Router / Firewall – UniFi Dream Machine Pro. Dual-WAN capability and an intuitive web UI mean you can hand off basic admin tasks without teaching the CLI.
- Core Switch – UniFi Pro Max 16 PoE (180 W). Fan-free, quiet, and still powers cameras, access points, and a VoIP ATA without stressing the budget.
- Power – CyberPower CP1500PFCLCD units. Roughly two hours of battery life for the router, switch, and Wi-Fi; a fourth 900 VA unit up top isolates the VoIP gear.
- Patch Panel – 24-port Cat-6 keystone panel. Keeps terminations modular; if a jack fails, pop it out, drop a fresh one in.
- Cable Management – Brush panel, horizontal bar, and fiber router-to-switch 10G uplink. SFP+ ports on both the router and the switch give headroom for the future.
- Rack – TecMojo 20 U open-frame. Open sides keep airflow open, and the price is right for small offices.
- SPF+ modules – 10GTEK 10GBase-SR SFP+ LC Transceiver + 10Gtek 1.25/2.5/5/10G-T SFP+ to CAT.6a Transceiver.
Power First, Everything Else Second
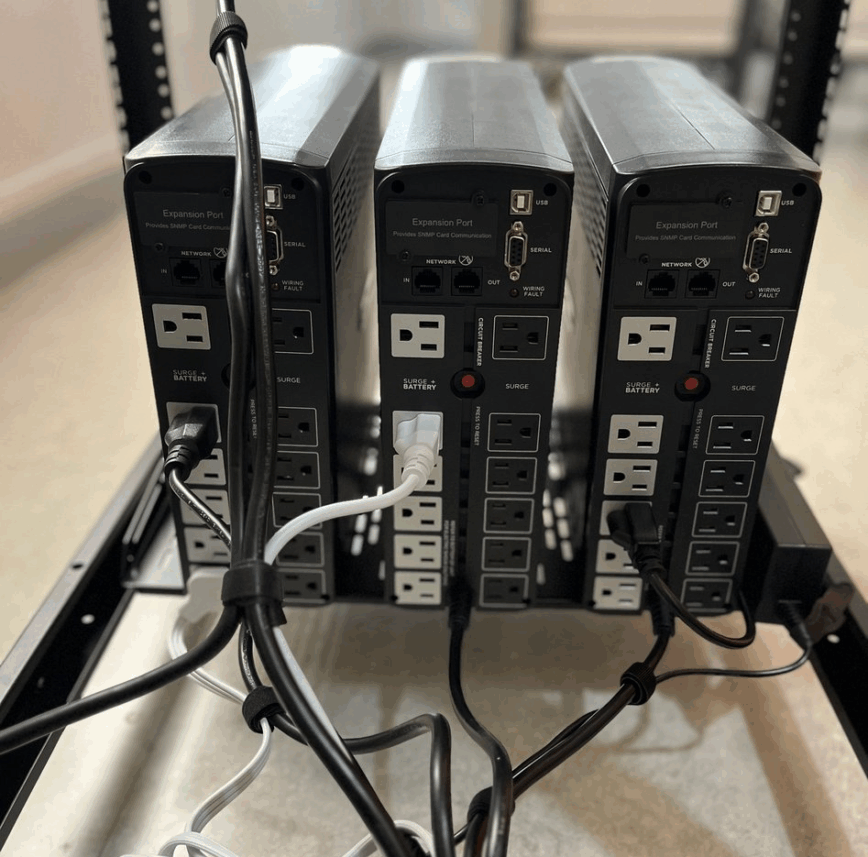
Because this office sits on an unreliable utility feed, brief brown-outs occur, and multi-hour outages aren’t unheard of. The rack had to stand on its own until the standby generator kicks in (or someone figures out why it didn’t). That requirement drove an atypical battery layout:
Three 1500 VA UPS units secured on the bottom shelf share the 20 A dedicated circuit.
- ~ 2 h of runtime for the router, core switch, and Wi-Fi.
- Just over 1 h for the PoE cameras.
One 900 VA UPS on the top shelf is reserved for the VoIP GrandStream device, so phone service survives even a prolonged blackout.
All four UPSs plug directly into the quad-gang wall outlet; the lighter-rated 15A 1U PDU is intentionally not on battery, providing a few extra convenience sockets for temporary power when near the rack.

Tip: If you need multiple UPSs, don’t daisy-chain them!
Max watts when charging from 20% was tested at around 80-120 watts max per UPS. Of that range, the UPS-1 (with the PoE cameras) pulls the most watts when charging. So even when combined, at 120 watts x 4 (grossly overestimated) it is well within the 20A circuit capacity.
| Scenario | Power Draw per UPS | Total for x4 UPS Units | 20 A Circuit Capacity |
|---|---|---|---|
| Charging from ~ 20 % (my tests) | 80–120 W | 320–480 W | Max 2400 W (1600 W continuous) |
| Manufacturer rating (no load) | 30–60 W | 120–240 W | Max 2400 W |
I didn’t take photos during those tests; however, my home lab UPS which uses the same model, CyberPower 1500VA, but with a gaming PC and 2 ThinkPad Tiny servers plugged in while charging, pulls a max of 200 watts when charging [PHOTO].
As you can tell from what’s in the rack and the photos of unused UPS-backed ports, these UPS units are not heavily loaded, and so even during charging, the total power draw remains well within safe limits for a 20 A circuit [PHOTO].
Network Layout
Here’s how the office network is set inside the UniFi UDM Pro: a separate guest VLAN keeps staff devices isolated from guest traffic, and a second ISP is primed for automatic failover the moment it goes live.
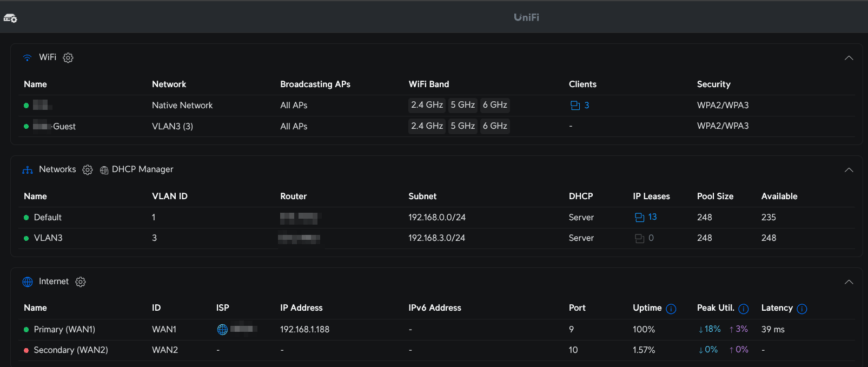
Everything was configured in the UniFi web UI.
- Primary network: Staff LAN: desktops, VOIP, etc.
- Separate VLAN: Guest Wi-Fi: internet only.
- Ceiling APs: two installed; one arrived dead and was RMA’d.
- Dual-WAN: secondary ISP set for failover only. (awaiting 2nd ISP to install service)
Five Takeaways for Small-Office Networks
Planning a network rack or home lab can feel overwhelming, yet the fundamentals rarely change. Focus on the few practices below, and you will avoid many headaches that often plague small-office and network racks in general. Each takeaway comes straight from lessons I’ve learned from real-world installs like this one:
- Solve power and airflow first. Reliable circuits, backup batteries, and adequate cooling/ventilation.
- Label while you work. Five minutes now saves an hour when something breaks later.
- Use brush panels or cable bars. They keep patch leads from kinking and ports from stress.
- Leave headroom in the rack. Aim for 60 percent capacity so upgrades don’t need a rebuild.
- Documentation. I keep a run-book in Google Drive as well as shared credentials and instructions.
I’ll post those follow-ups—and any hiccups—on LinuxCommunity. Meanwhile, if you have a switch balanced on a router, grab a weekend and a label maker. Your future self will thank you.
Conclusion
A tidy rack isn’t about showing off network gear; it’s about eliminating single points of failure, slashing troubleshooting time, and giving yourself room to grow. By lining up power, labeling every run, and sticking to gear that matches the environment’s realities (like shaky utility power), this build turns a broom closet into an infrastructure room that you can forget about.
If you’re staring at a pile of devices balanced on a shelf, start with a small rack and give everything a home. The payback is immediate: the next time the lights flicker or you need to add one more switch port without untangling a mess. Questions, critiques, or your own closet-war stories? Drop them in the comments, or please share this post to help support this blog.