Linux Troubleshooting: These 4 Steps Will Fix 99% of Errors
I’ll admit, I hesitated a bit before writing this post. The whole point of this linuxblog.io and linuxcommunity.io forum is to bring together like-minded Linux users and professionals so we can troubleshoot, share ideas, and learn from one another. For a moment I thought, is it really productive for me to publish something that shows new Linux users how to solve 99% of their Linux problems on their own?
But in the spirit of transparency and community, I decided it was worth it. The blog has mostly been a log of issues I’ve personally faced and fixed over the years, but I haven’t really written a guide that ties everything together into a clear, repeatable process. Apart from my post on Troubleshooting Network Issues.
My hope is that after reading this, you won’t just take the information and disappear, but that you’ll still find value in being part of a community where we share our journeys, challenges, tips, and solutions. Because beyond just solving errors, it’s about the human interaction and learning from each other. That’s what community is for, and I think it’s what helps us all keep getting better at what we do.

Over the years, I’ve fixed my fair share of Linux issues, as many of you have. From servers that refused to boot to services that mysteriously stopped responding, each experience reinforces the same lesson: troubleshooting isn’t about guessing; it’s about method. Once you slow down and follow a clear process, even the strangest errors start to make sense.
Any unexpected Linux error can feel frustrating. But the good news is that almost every problem on Linux can be solved by following a simple, systematic approach. Four basic steps that will work for nearly any issue. The key is to be methodical. Effective Linux troubleshooting follows a systematic approach, testing one possibility at a time.
In this post I’ll share the core steps most sysadmins use when Linux throws an error. This approach works on both Linux servers and also Linux desktop systems and will help you tackle anything from boot failures to stubborn apps.
Step 1: Gather clues and define the problem
Start by reading the error message or symptoms carefully. I always ask myself, “What exactly is broken?” A vague thought like “the server is broken” won’t help; instead, be specific, like “the web server returned a 503 on /api/users”.
Take note of context: When did it first happen? Did you just update a package, change a config, or reboot the machine? These details are crucial.
Dig deeper into the possible cause(s) of the error and try to reproduce the issue when applicable. For example, if you install a drive and it’s not showing up, you can’t reproduce that, but you can dig deeper.

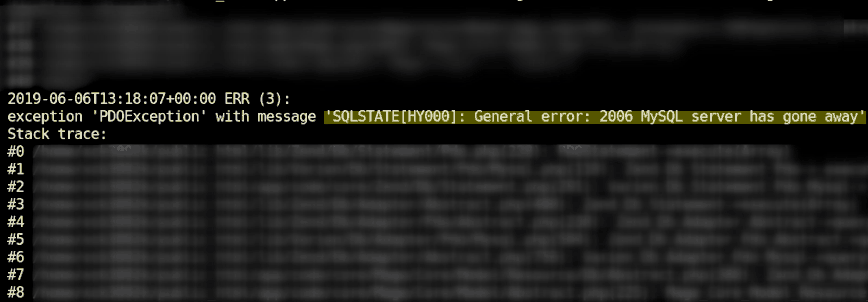
Image from the article: “MySQL server has gone away” error – Solution(s).
Capture the exact error output when available: often the system, service, or application will print a clue. In most cases, you can see additional info by running an application from terminal.
As the Linux Mint guide advises, “If an application isn’t working correctly, close it and run it from the terminal. It might output error messages… which will give you clues about the cause of the issue”.
I know sometimes it’s hundreds of lines!! But it’s worth scanning because the clues to the fix are usually in there.
For example, a GRUB rescue prompt or a kernel panic at boot is itself a descriptive clue; note down any error codes or messages.
Gathering this information up front gives us the “what” to fix and provides clear clues for later.
Step 2: Look at system status and logs

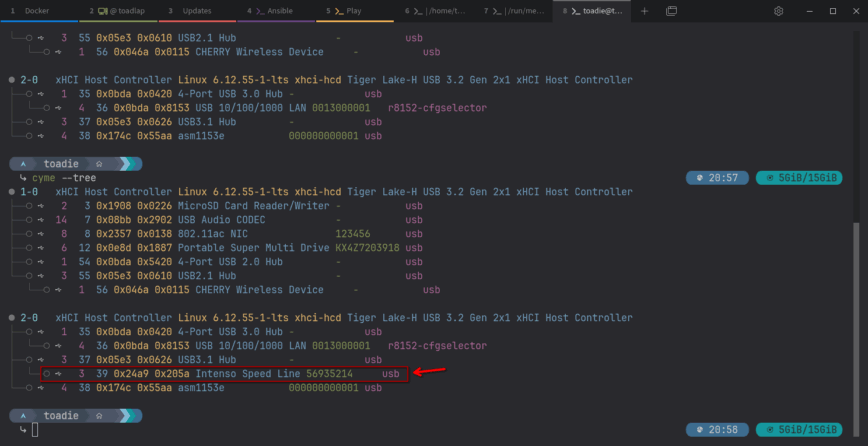
Screenshot from @toadie in the Linux Support topic “Port” identification.
With the problem defined, examine the system’s current state. Are the CPU, memory, disk, and network healthy?
I usually run commands like top and htop (for CPU/RAM), df -h and du (for disk space), and ip a or ping (for networking) to see if something obvious is overloaded or offline.
Then dive into the logs. Linux logs are made for this purpose; they often hold the clues you need.
For kernel or boot issues, check dmesg (kernel ring buffer) or journalctl -xb for the current boot.
For services, use journalctl -u <service> or look under /var/log/ (e.g. /var/log/syslog or a daemon-specific log). You can also use the dmesg command.
Read those log entries around the time of the error. Even if you don’t immediately understand every line, keywords, or process names can be gold.
For network problems, simple tools like traceroute can test connectivity, and the ip command or ifconfig (or looking at /etc/network/interfaces) shows interface status.
For disk/storage issues, check lsblk, blkid, or SMART status.
Essentially, use the built-in Linux commands to gather facts relevant to the system’s problematic state.
If a log file is huge, search it: e.g. grep -i error /var/log/syslog or journalctl | grep "segfault" to find relevant entries.
I’ve covered a few useful troubleshooting tools in the 10 articles below:
- Linux top: Here’s how to customize it
- htop: Quick Guide & Customization.
- htop and top Alternatives: Glances, nmon.
- btop – the htop alternative.
- atop for Linux server performance analysis (Guide).
- iotop command in Linux w/ examples.
- df command in Linux with examples.
- du – estimate and summarize file and directory space usage on Linux.
- ip command from iproute2 – utilities for TCP/IP networking in Linux.
- ping command in Linux with examples.
Need peer-to-peer troubleshooting help? Head over to our forums at linuxcommunity.io.
Step 3: Analyze and test potential fixes

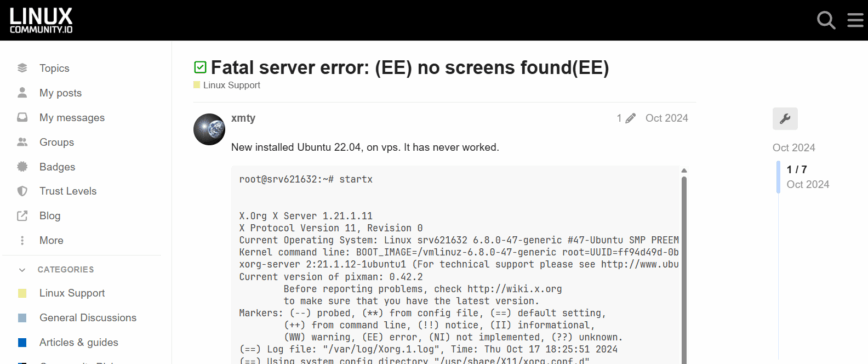
Screenshot from: Fatal server error: (EE) no screens found (EE).
Once you have the error message and relevant logs, it’s time to do some detective work. You can copy-paste key error phrases into web search, AI chatbots, search the distro forums, or the distro’s wiki, like Arch’s Wiki. Many problems have already been encountered by others, so Googling exact errors can quickly reveal hints. If you’d like to document your fix online so you can revisit it later, help others facing the same issue, or simply share your troubleshooting journey (from the initial error to the solution), you can post it in our forums at linuxcommunity.io.
Meanwhile, think through possible causes. Based on what you know (the symptoms, recent changes, and log clues), form a hypothesis about what’s wrong. For example, if an application fails with “Segmentation fault,” you might suspect memory corruption or a bad library; if a service logs “permission denied,” check file permissions and SELinux; if a boot error says “device not found,” maybe the disk UUID changed. Pick the most likely cause and plan a test.
The key is to change one thing at a time when testing. So if you think a package upgrade broke something, try rolling it back on a test system. If you suspect a missing config file, create a fresh config and see if that helps. For instance, if a web service throws 503 errors only after recent deployments, check the new configuration or code. By isolating variables, you’ll quickly see what change fixes or affects the issue.
Step 4: Document the fix after verifying

Screenshot from: Fixing apt-key deprecation warnings with cPanel EA4 on Ubuntu 20.04 to 22.04.
Once you’ve identified the cause, apply the fix carefully. Usually, it’s a simple config change or reinstalling a package. If it’s more involved (like replacing hardware or rebuilding an initramfs), proceed step by step and always keep backups or snapshots so you can revert if needed.
After applying the fix, test thoroughly (verify) to make sure the problem is resolved and nothing else broke.
Lastly, document the fix! Keep notes on what you changed and why, in case the issue reappears or another person needs the solution. I’ve been doing that by blogging about issues and their solutions and, more recently, posting issues I’ve solved on our community forums.
Beyond a note-to-self type of documentation, it might, in work-related cases, mean writing a quick summary email to your team or adding a comment to a ticket system. The important part is to make sure you save your solution. Especially if it took hours to solve, you never know when months or years later you will come across the same or a similar issue. I have repeatedly gone back to previous blog and forum posts.
Example 1: Boot Failure
Step 1: Gather clues and define the problem.
Your Linux server won’t boot and drops to a GRUB rescue or emergency shell. Start by noting the exact error, such as error: no such device UUID or a kernel panic on root fs. Did this happen after a kernel update or partition change?
Step 2: Look at system status and logs.
Boot from a rescue disk or live USB, mount your root filesystem, and inspect /var/log/boot.log or the system journal (journalctl -b -1). Look for clues like missing modules or “filesystem not found.”
Step 3: Analyze and test potential fixes.
Maybe the disk UUID changed or the initramfs needs rebuilding. If so, edit the GRUB command line or chroot into the system to run update-grub or dracut to regenerate boot files.
Step 4: Document the fix after verifying.
Apply one fix at a time, such as correcting /etc/fstab or reinstalling GRUB, then reboot to verify. Notice how we ran through the 4 steps. Following a methodical process turns a boot failure from panic into procedure.
Example 2: Application Won’t Launch
Step 1: Gather clues and define the problem.
Click an app and nothing happens? Run it from a terminal to see the error output. For example, type firefox and check for messages like “missing library” or “no DISPLAY found.”
Step 2: Look at system status and logs.
If it reports a missing library (libXYZ.so.1 not found), reinstall that package. If it says “permission denied,” check file permissions or SELinux/AppArmor rules. Some apps log errors to ~/.xsession-errors, ~/.config/<app>/, or journalctl. For services, use systemctl status <service> or journalctl -u <service> to see what’s wrong.
Step 3: Analyze and test potential fixes.
Compare error messages to known issues online or in distro forums. Consider whether recent updates, missing dependencies, or bad configs might be the cause.
Step 4: Document the fix after verifying.
Fix the likely cause, adjust a config, reinstall a package, and rerun the app. If it still fails, review the new error, refine your theory, and test again.
Example 3: Nginx Error or Service Failure
Step 1: Gather clues.
If your Nginx server stops responding, start by checking its status:
sudo systemctl status nginx
Step 2: Look at the logs.
Look for hints such as “failed to start” or “address already in use.” Then review the logs:
sudo tail -n 20 /var/log/nginx/error.log
Step 3: Analyze and test.
Most problems come from issues with bad configuration, missing SSL files, or another service using port 80 or 443. Test the configuration before restarting:
sudo nginx -t
Step 4: Document the fix.
Restart Nginx once the config passes the test:
sudo systemctl restart nginx
curl -I http://thewebsite.address/
Confirm it is serving requests correctly, and note what was fixed for future reference!
Example 4: Docker Container Won’t Start
Step 1: Gather clues.
When a container fails to start or exits right away, check its status:
docker ps -a
Step 2: Look at the logs.
Review logs to see why it failed:
docker logs <container_name>
Step 3: Analyze and hypothesize.
Look for errors such as “port already in use,” “permission denied,” or “file not found.” These often point to port conflicts, bad environment variables, or volume permission issues.
Inspect the container definition (docker compose.yml or run command) to confirm that paths, ports, and variables are correct.
Step 4: Document the fix.
Adjust the configuration, correct environment variables, or fix file permissions.
If the image or container build is outdated or broken, then rebuild and redeploy it:
docker compose build
docker compose up -d
You can also test interactively inside the container:
docker run -it <image_name> /bin/bash
Verify dependencies and configuration before restarting the service. Once fixed, document the cause so it can be avoided in future deployments.
Conclusion
These steps create a reliable framework that, if followed carefully, will help you troubleshoot nearly anything in Linux. By defining the issue, checking logs, forming a hypothesis, and verifying fixes, you remove guesswork and solve problems faster.
TIP! – Remember it as GLAD: Gather, Look, Analyze, Document. A simple way to troubleshoot almost anything in Linux.
Whether it is a crashed service, a stuck update, or a boot failure, the same systematic steps apply. Stay calm, be methodical, and use Linux tools like journalctl, dmesg, top, and ping to uncover the root cause.
I can’t even count the number of times I’ve solved an issue, only to run into it again months or years later. Because I’d logged it on the blog or in the forums, I’m able to quickly find the exact command, config tweak, or process I used to fix it. Keeping a record, even just for yourself, makes a huge difference! And when you share it publicly, it not only helps you, but it also helps others who are bound to face the same thing down the road. Many Linux issues repeat themselves, and the first thought when they do is always the same: “What did I do to solve this the last time?!”
Want to dig deeper into troubleshooting? Also see these linuxblog.io articles:
- traceroute command in Linux with examples
- grep command in Linux w/ examples
- find command in Linux with examples
- ss command in Linux with examples
- vmstat command in Linux w/ examples
- smem: Diagnosing Swap Usage on Linux
- Free vs. Available Memory in Linux
- Linux Server Performance: Is Disk I/O Slowing Your Application?
- What is iowait and how does it affect Linux performance?
- 30 Linux Sysadmin Tools You Didn’t Know You Needed
So I was thinking there’s an easy way to remember this. I know it’s corny, lol, but:
GLAD - Gather, Look, Analyze, Document
G – Gather clues and define the problem
L – Look at system status and logs
A – Analyze findings, form a hypothesis
D – Document the fix after verifying
That’s easy to remember and has a positive connotation. Will edit the article and add to the end.
Love this! Very great article!
I like the mnemonic GLAD you should patent it. Before it ends up on someone else’s training video on UDEMY. And it’s not as corny as some of the other ones I’ve seen/ heard for the last 17 years of Technical Support… none of which I remember from those trainings.
Thanks! I’ll take that as a compliment. No trademark though. Let’s consider it fully open-source. I’d honestly be flattered if it ever made it that far!
Funny story, many years ago, I told Cloudflare about an image optimization process for their image-serving and how they could implement it, which they then launched a few months later. As a thanks, they sent me a t-shirt and a signed card that read:
My only wish was they offered that Polish service free, because it really helps make the internet lighter and faster. And I guess keeping my original suggestion online for reminiscing’s sake.
Thanks for this article, I’ll keep in consideration in case I’ll need to debug something!