Linux Commands frequently used by Linux Sysadmins – Part 3
Last week and the week before, I published part 1 and part 2 of this five-part series entitled: Linux Commands frequently used by Linux Sysadmins. Those two articles took us a bit deeper into what I believe are around 50 to 100 commands often used by Linux Sysadmins and power users. Also, see Part 4 and Part 5.
Let’s jump into part 3 with another set of commands and command-line tools often used for file transfer, file manipulation, network troubleshooting, and other administrative tasks performed by Linux systems. In this and future series, I will group related commands as much as possible and also add a table of contents to interlink all five parts of this series.

1. rsync – remote file transfers and syncing.
Rsync (remote sync) is an open-source tool for file syncing between both local and remote systems. Back in 2016, I was tasked with setting up a global CDN-backed mirror for Linux distros and other repositories: Evowise CDN (https://mirros.evowise.com). This project relies heavily on rsync to ensure that hundreds of terabytes of files are always in-sync. Over time, more distros have offered their own global CDN backed mirrors; however, there is still only a handful of multi-distro and multi-software mirrors. Here’s an example of using the rsync command to backup files remotely:
rsync -avze ssh /path/to/directory1/ user@IP_or_hostname:/remote/backup/directory1/
To download from the remote directory, reverse the order of the command:
rsync -avze ssh user@IP_or_hostname:/remote/backup/directory1/ /path/to/directory1/
Rsync is an entire topic in itself. As such, let’s revisit this command more fully at a later date. In the meantime, the best place to start would be to read the documentation and cheat sheets.
2. tar, gzip, b2zip, and zip file manipulation.
tar (tape archive) is an archiving utility.
To extract from an archive use: (with options x = extract, v = verbose, f = file):
tar - xvf archive.tar
To create an archive from files or a directory, use: (with option c = create)
tar -cvf archive.tar file1 file2 file3
To create compressed archives, use: (with option z to compress with gzip)
tar -cvzf archive.tar file1 file2 file3
To show all files held in an archive use (with option t = list):
tar -tvf archive.tar
gzip stands for GNU zip. It’s used for file compression and decompression.
To create a compressed file, use:
gzip file1
To decompress a file, use:
gunzip file1.gz
As an archive created using tar will not be compressed without additional options; this can be done by using gzip.
To combine files in a compressed archive use (with option z = gzip):
tar -cvzf archive.tar.gz file1 file2
Which will result in archive.tar.gz
To decompress and extract files from a gzip archive, use:
tar -xvzf archive.tar.gz
bzip2 is similar to gzip. It just uses a different compression algorithm.
To create a compressed file, use:
bzip2 file1
To decompress a file, use:
bunzip2 file1.bz2
To combine files in a compressed archive use (with option j = bzip2):
tar -cvjf archive.tar.bz2 file1 file2
Which will result in archive.tar.bz2
Top decompress and extract files from a bzip2 archive use:
tar -xvjf archive.tar.bz2
zip is used for packaging and compressing (to archive) files.
To combine individual files in a compressed archive, use:
zip archive.zip file1 file2
To combine entire directories into a compressed archive:
zip -r archive.zip directory1 directory2 directory3
To decompress and extract files or directories from a zip archive, use:
unzip archive.zip
To show all the files stored in an archive, use:
unzip -l archive.zip
3. locate – search files in Linux.
In part 1, we touched on using find and grep. Locate uses a background process that runs periodically to search and store your system’s files in its own database. Therein lies its only advantage… speed!
On some distros, Ubuntu, for example, you have to install manually:
sudo apt-get install locate
To search for a file use (with option i = ignore case):
locate -i filename
For example:
hydn@ubuntu:~$ sudo locate -i firewall
/etc/fail2ban/action.d/firewallcmd-allports.conf
/etc/fail2ban/action.d/firewallcmd-common.conf
/etc/fail2ban/action.d/firewallcmd-ipset.conf
/etc/fail2ban/action.d/firewallcmd-multiport.conf
...
The database will be updated daily via cron. However, if you need to update it manually, you can use:
sudo updatedb
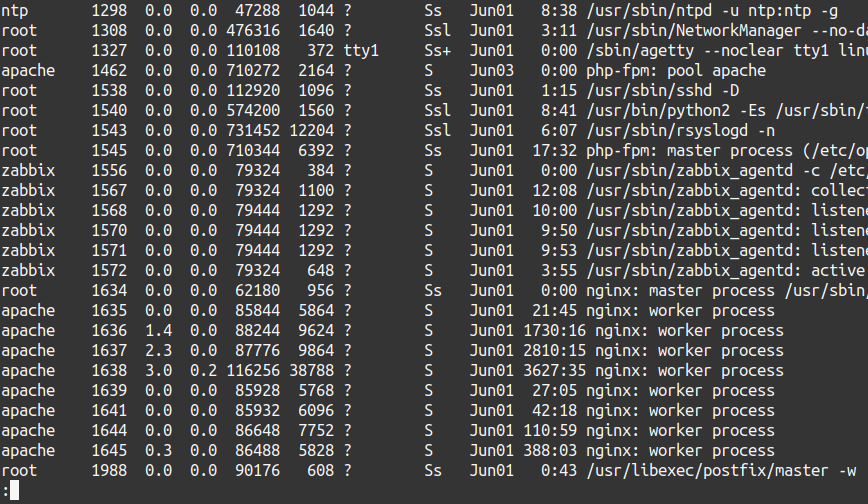
4. ps – information about the currently running processes.

In part 1, we looked at pstree, a more visual alternative to the ps command. One way of using ps to obtain more information on running processes is to use the following:
ps aux | less
The a option will list all users’ processes except group leaders and processes that are not associated with a terminal.
The u option provides detailed information about each process.
The x option will list all processes when used together with the a option.
To show a process tree:
ps axjf | less
To show info about threads, use:
ps -eLf | less
ps axms | less
To view every process running as root in user format, use:
ps -U root -u root u
To show only the process IDs of syslogd, use:
ps -C syslogd -o pid=
To show only the name of PID 411, use:
ps -q 411 -o comm=
The above examples are from man ps.
5. Making use of Bash scripts.
A Bash script is a plain-text file containing a series of commands. These are commands that we would usually type into the command-line (i.e., rsync ... or cp ...), but we would like to save time by not having to type commands manually each time, or, we would like to schedule those commands to run later, using cron.
To create a bash script, place #!/bin/bash at the top of the file. Here’s a simple bash script for running backups:
#!/bin/bash
rsync -avze ssh /path/to/directory1/ user@IP_or_hostname:/remote/backup/directory1/
echo "Remote backup for $(date) " | mail -s "backup complete" user@youremail
Once you type or paste this into a new file, you can save it as scriptname.sh. In this case, remotebackup.sh. Then, change the permissions of the file to make it executable:
chmod +x remotebackup.sh
To execute/run the script from the current directory, you type:
./remotebackup.sh
Or you can schedule the Bash script to run using corn, as discussed in the next section.
Also, see Ubuntu’s Beginners Bash Scripting.
6. cron – Set up scheduled tasks to run.
The cron daemon is a built-in Linux tool that runs scheduled tasks (commands or shell scripts) periodically at fixed times, dates, or intervals. Sysadmins typically use cron to automate system maintenance and administration tasks. For example, by using cron to run rsync nightly.
Here’s an example of a cron single-line entry used to run a backup script every night at 2 am:
0 2 * * * ~/myscripts/remotebackup.sh
To get started, read the cron setup guides created by Ubuntu and Red Hat and reference the cron man page. There are also online cron expression generators.
7. nmcli – network management.
NetworkManager is a set of tools to manage network connectivity on your Linux system. It works for wired, wireless, and even Bluetooth connections.
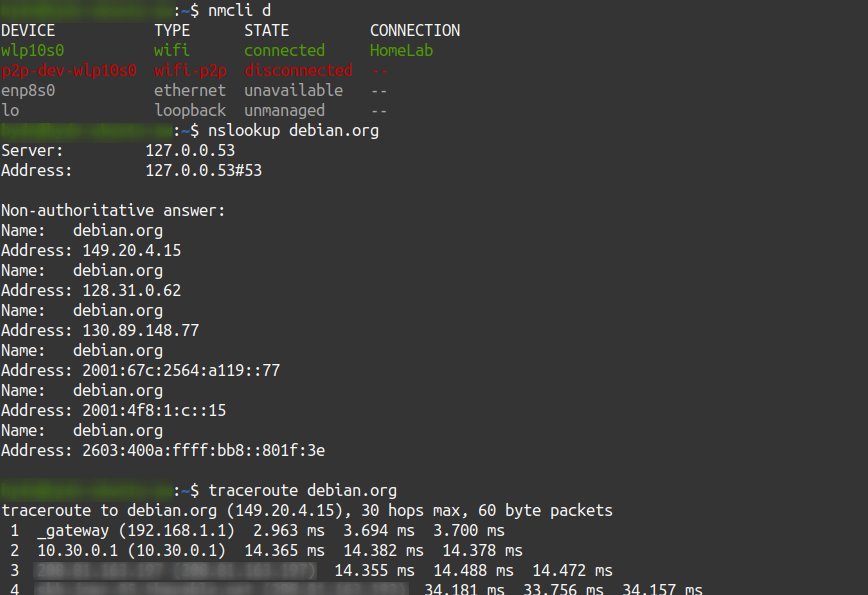
To show all available network devices use:
nmcli d
For example:

Red Hat has published a great networking guide for nmcli.
8. ping – send ICMP ECHO_REQUEST to network hosts.
The ping (Packet Internet Groper) command is used to check network connectivity between servers and other hosts. You can enter the IP address or the URL, and the ping command then sends a data packet to the specified address with the message “PING” and waits for a response from the destination server/host. The time it takes to receive this response package is reported. This time is called latency. Low latency = faster connection response.
ping [hostname/ip]
For example:

Use the -c flag to specify the number of ping packets to send. For example:
ping -c 5 IP_ADDRESS
9. traceroute – check the route packets take to a specified host.
traceroute checks the route that packets take to reach a specified host. It utilizes the IP protocol’s time-to-live (TTL) field and attempts to elicit an ICMP TIME_EXCEEDED response from each gateway along the path to the host. (Source: man traceroute) Traceroute can help find the source of network latency delays, outages, and other network routing issues.

Also, have a look at mtr (My Traceroute).
10. nslookup – query Internet name servers (NS) interactively.
nslookup (Name Server Lookup) is a command used to gather information from Domain Name Systems (DNS). With nslookup, sysadmins can query domain name or IP address info.
To look up a domain’s A record, use:
nslookup linuxblog.io
To look up the NS records of a domain to find out its authoritative servers, use:
nslookup -type=ns ubuntu.com
To look up a domain’s MX records, use:
nslookup -query=mx redhat.com
To look up a domain’s SOA (start of authority), use:
nslookup -query=soa debian.com
To show a domain’s list of DNS records, use:
nslookup -type=any mysql.com
To look up a domain’s rDNS (reverse DNS), use:
nslookup [domain_IP]
Also, see the host and dig commands.
Extra tip: Check out explainshell.com to match command-line arguments with their help text.
That’s it for now. I hope you enjoyed part 3. Please share, subscribe, bookmark, and leave any comments or suggestions you may have.
< Previous – Linux Commands frequently used by Linux Sysadmins – Part 2
Next – Linux Commands frequently used by Linux Sysadmins – Part 4 >
rsync has been my go-to for pushing backups offsite for years now. Just make a cron and it never fails, really nice.
About compression, have you tried pigz? Seems to just be a better gzip. It has a noticeable performance improvement for me.