Official ArchWipi – Download Arch Linux Raspberry Pi WiFi Access Point
Changelog
- 08-08-2019 – Raspberry Pi 3 and 4 now comes with a built-in WiFi radio and you can follow this guide to setup as an AP.
- 03-22-2015 – Added Raspberry Pi 2 support.
- 07-17-2014 – Stripped down and optimized Arch Linux even more.
- 07-17-2014 – Due to popular demand, I’ve extended partition. There’s now 700MB of free disk vs 90MB previously.
- 07-17-2014 – 138 Packages updated using pacman -Syu.
- 07-17-2014 – Now Model B+ compatible. Also, compatible with more Wifi dongles.
- 01-26-2014 – Config changes to address issue of random network drops that required reboot for reconnection.
- 01-25-2014 – Overclocking improvements. Please see the /boot/config.txt file for more aggressive overclocking options.
- 01-24-2014 – Stripped down and optimized Arch OS even more. Boots in less than 10 seconds.
- 01-23-2014 – Updated overclocking config with improvements /boot/config.txt
- 01-23-2014 – Installed bcmstat.sh to replace cpustatus.sh see usage below
- 01-22-2014 – Changed the root login password for Pi to: archwipi

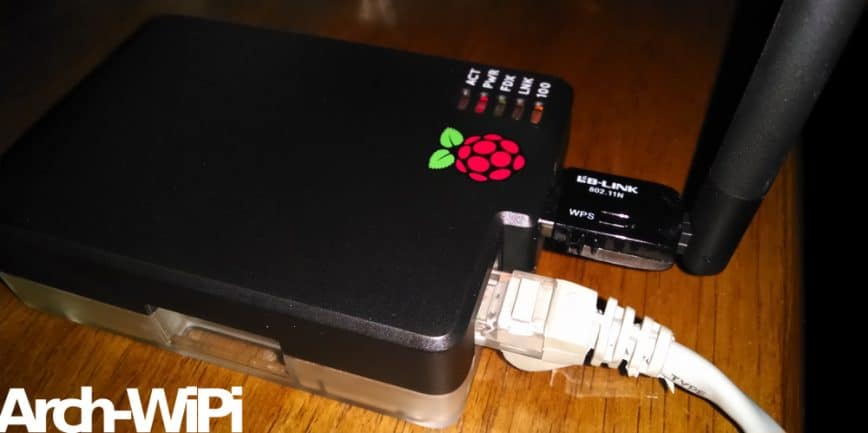
Are you looking into turning your Raspberry Pi into a Wireless router? Then I’ve created a tiny Arch Linux ARM + create_ap (by oblique) based setup, packaged into a downloadable image that may interest you. Once booted the access point will create SSID ArchWiPI via network address translation (NAT).
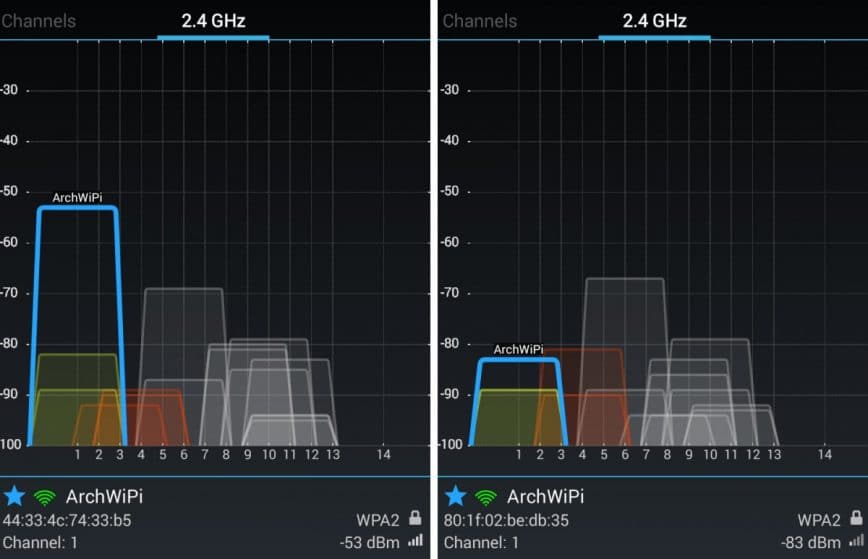
UPDATE: Today I received my LB-Link long Range WiFi USB Antenna which replaced my Edimax EW-7811Un If you prefer mini dongles the best I’ve tested so far is TP-LINK TL-WN725N Wireless N Nano USB Adapter. These were manufactured for two very different purposes, I still love both. The LB-Link has more than double the range while the Edimax is about the length of a finger tip! But for the this project of turning the Raspberry Pi into a wireless router the LB-Link is a must have! Here are some comparisons of signal strength from about 20 feet away in another room. The LB-Link is on the left and Edimax on the right….

Arch Linux Raspberry Pi WiFi AP Requirements
- Raspberry Pi Model B Revision 2.0
- Power adapter with at least 1500 mA (2 amp recommended)
- Minimum 2GB SD Card Fat32 formatted
- Wifi USB dongle running rtl871xdrv. Eg. Edimax EW-7811Un. (I recommend this or this)
- Network Cable with Internet access. (eg. Internet cable from your cable modem)
Image Installation and Access Point Setup
- Download my Arch Linux Wireless Raspberry Pi image: archwipi.img.tar.gz (252MB)
- Extract it. eg: sudo tar zxf archwipi.img.tar.gz
- (For Linux and Mac) Write the extracted image to SD card. eg: sudo dd if=archwipi.img of=/dev/sdx bs=1M …change sdx accordingly. Don’t run this command if unsure!!!
- Optional – extend partition to use all of disk. You can use gparted.
- Plug your internet cable and new Arch WiPi SD card into your Raspberry and power it on.
- Everything is automated so after a minute or so scan for a new network SSID = archwipi
- If you don’t see the archwipi SSID, then it means you need to manually install your WiFI dongle drivers.
- The wifi password password is: 1010101010
- If you need to login to the Pi the credentials are: root | archwipi
- You can change the WiFi password to what ever you like by editing: /usr/lib/systemd/system/create_ap.service
- Check CPU speed, temperature and more using ./bcmstat.sh
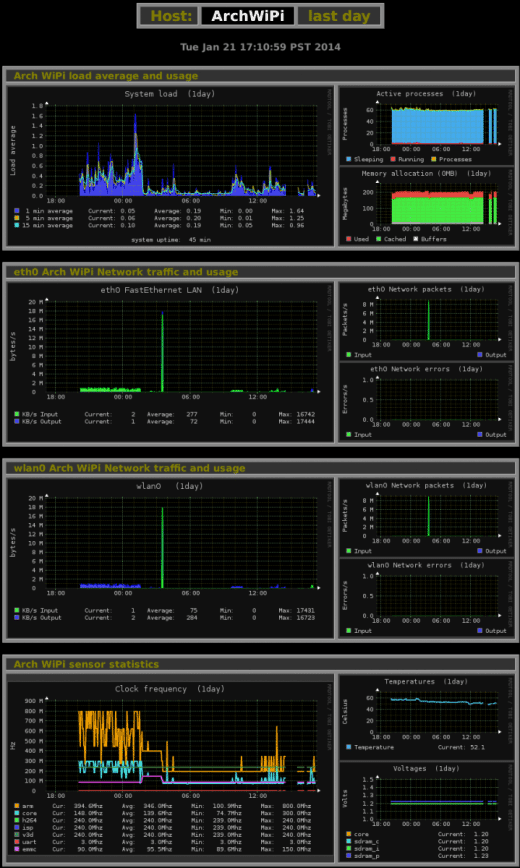
- You can also view graphs of Pi stats, browse to this address 192.168.12.1:8080/archwipi (powered by Monitorix)
Example from the built in stats page (I was still tweaking and rebooting as well as swapping SD’s to compare different settings which the graphs reflect).

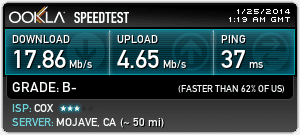
Note: There’s no over volting. However, the image comes with with modest over clocking to 800Mhz. I have plans for “under volting” in future updates which will help keep the Pi’s temperatures even cooler 24/7. However, with current settings the Pi’s arm will drop right down to 200Mhz when idle. Here’s speedtest.net results from my Laptop via Raspberry Pi WiFi router which is connected to ISP cable modem (pay for 25Mb/s plan):

Please let me know if you do try this. Your feedback will help ensure that this works plug-and-play for everyone.